
Who else is ready to trade winter blues for a burst of lucky green?
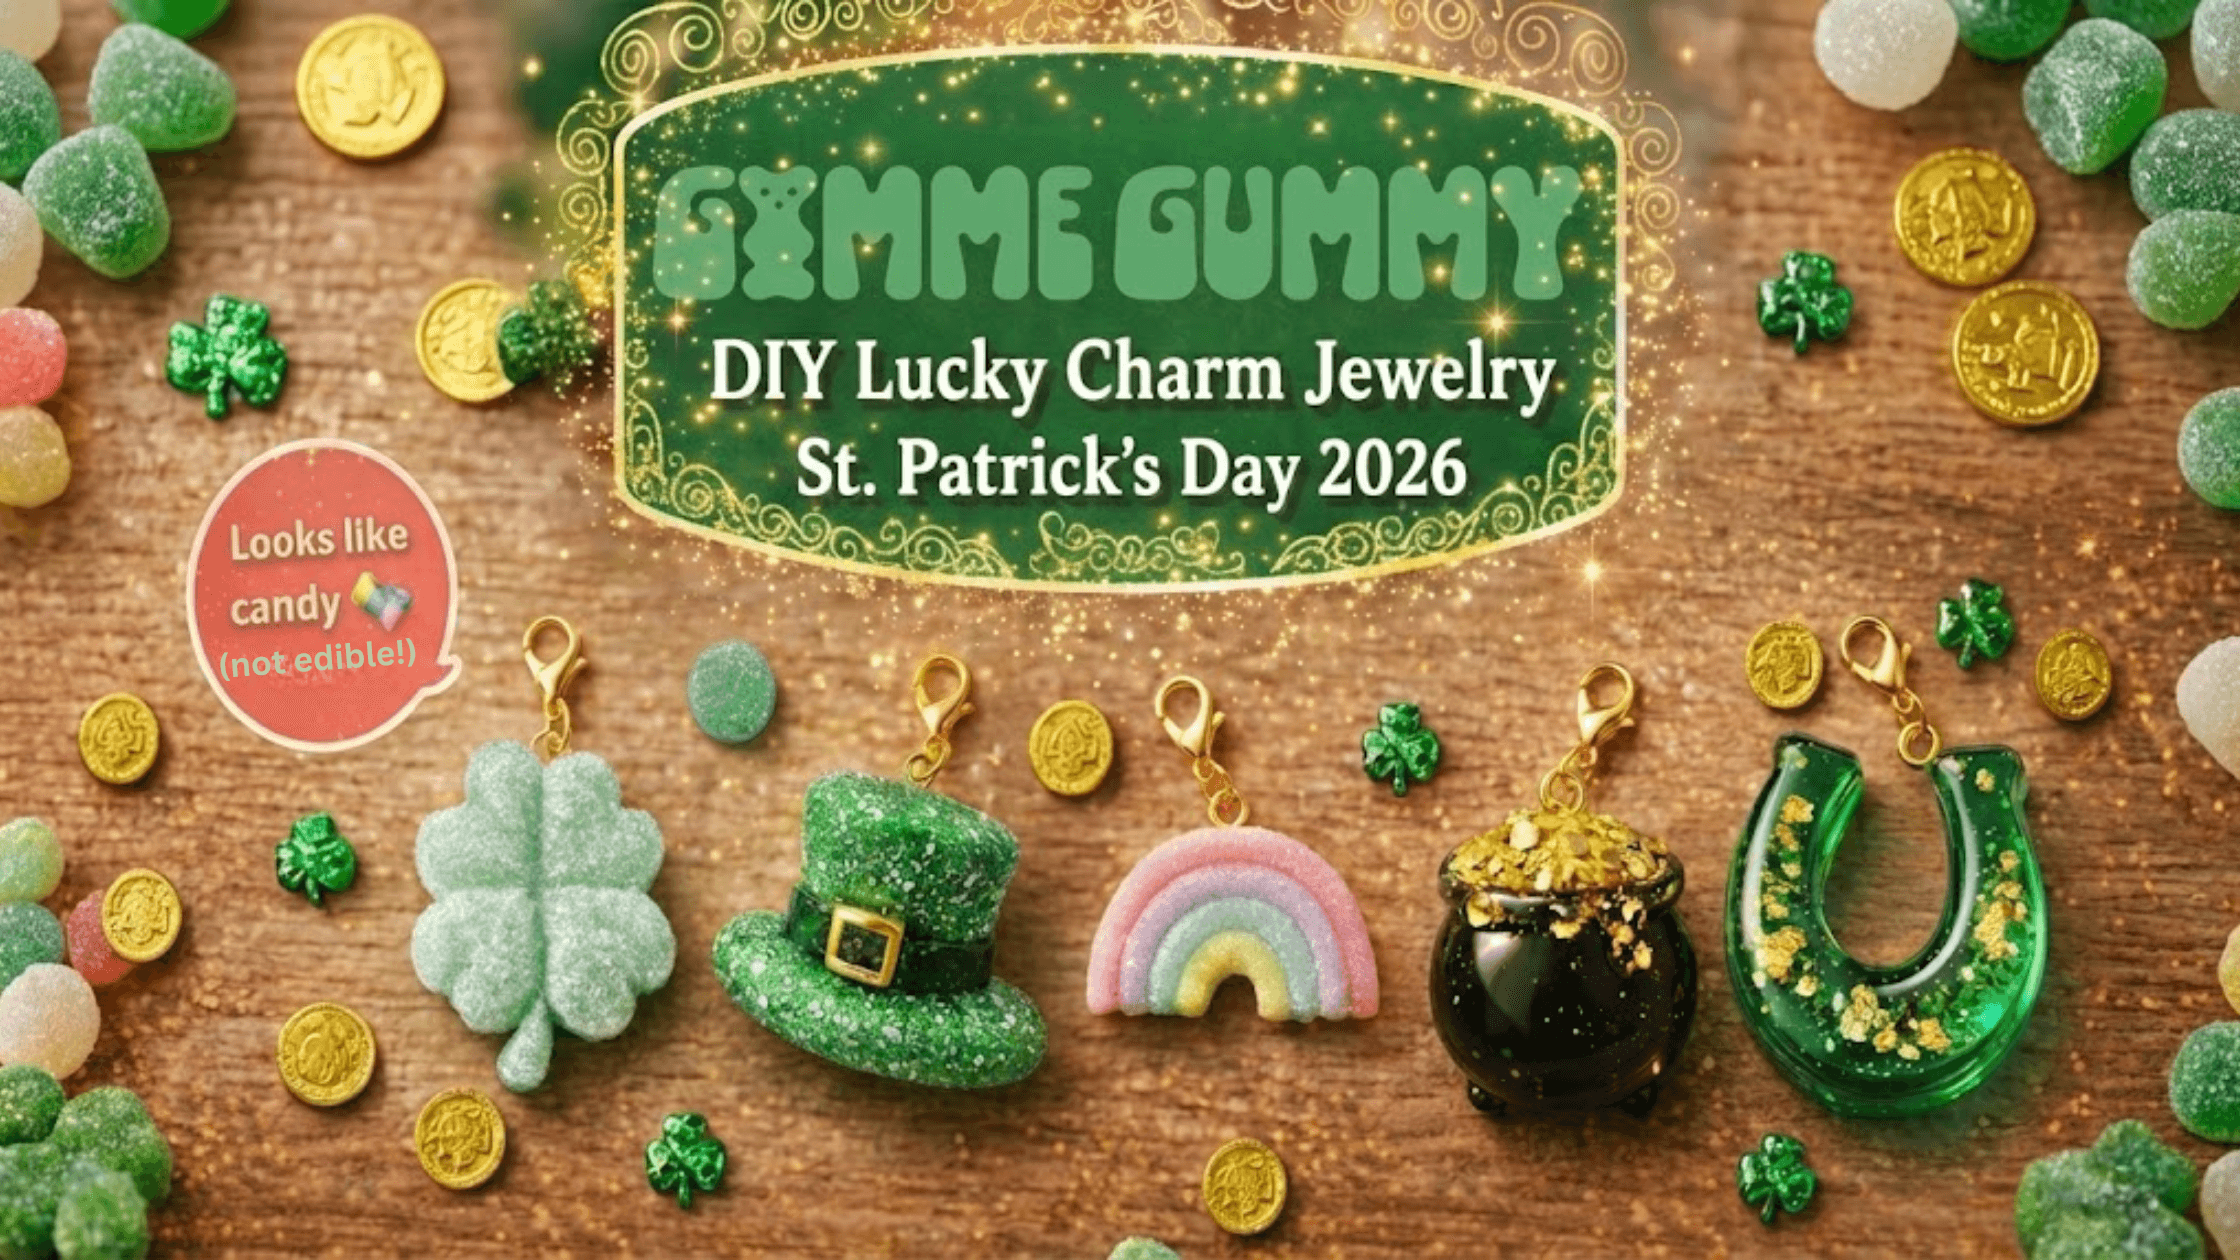
DIY Lucky Charm Jewelry is one of the easiest ways to tap into the 2026 “gimme gummy” trend, and create candy inspired St. Patrick’s Day accessories at home. In this tutorial, you will make gummy style resin and polymer clay charms that look soft, shiny, and touchable, even if you are a complete beginner.
This guide covers both methods in a simple way, including exactly what supplies are needed and step-by-step ideas for six different lucky charms. If you love sensory, squishy-looking textures, pretty pastel colors, and meaningful symbols, this is your kind of project.
Pin, bookmark, or save this tutorial to have it ready when it’s time to craft. 🍀✨
Why DIY Lucky Charm Jewelry Is The 2026 “Gimme Gummy” Trend
The “Gimme Gummy” and “Lucky Jewelry” trends are everywhere in 2026, and it makes sense. These pieces are playful, pretty, and feel a little bit magical.
Here is why I love them.
- Sensory, squishy style
These designs lean into tactile, 3D textures that look soft and touchable. Think jelly candy shine, frosted sugar crystals, and rounded shapes that catch the light from every angle. - Feel good “lucky” energy
More than ever, people want accessories that feel meaningful. A shamrock, horseshoe, or trinity knot is more than a cute charm, it is a quiet little reminder of luck, protection, and good things coming. - A grown up twist on nostalgia
These pieces give you that childhood cereal charm vibe, but in elevated materials like resin and translucent clay. It feels fun and sweet, without looking childish. - Totally personal to you
You can build your own “lucky charm buffet” and mix symbols that match your story. Maybe you wear a trinity knot for connection, a horseshoe for protection, or a tiny rainbow to remind you that good things follow the storm.
DIY Lucky Charm Jewelry fits this trend perfectly, because you can build pieces that feel playful, meaningful, and completely your own.
Heritage And Tradition: The Meaning Behind The Charms
If you love a little story with your craft time, this part is for you. Every symbol in this project has a bit of folklore behind it.
- Four leaf clover
The classic three leaf shamrock is a common symbol of Ireland. The rare four leaf clover is said to stand for faith, hope, love, and luck. Some legends even say it helps you spot mischief or keep bad luck away. - Lucky horseshoe
Horseshoes were traditionally made of iron, which people believed could protect against evil or bad spirits. Hanging a horseshoe above the door was a way to invite good luck in. Tip: keep the open end facing up so the luck stays inside. - Pot of gold
In Irish folklore, leprechauns hide their pots of gold at the end of the rainbow. Since a rainbow has no real end, the pot of gold has become a symbol of elusive treasure and the good things that come after a difficult season. - Retro marshmallow shapes
Hearts, stars, moons, and rainbows give a sweet nod to nostalgic cereal charms from childhood. They are playful, lighthearted, and perfect for anyone who loves a little throwback feeling in their style. - Celtic Trinity Knot (Triquetra)
This symbol has no beginning and no end, which is why it often represents eternity and connection. It can stand for many things, such as earth, sea, and sky, or mind, body, and spirit. It has a slightly academic, old world look that feels beautiful and timeless. - Irish Top Hat with Gold Buckle
The tall green hat with a black band and gold buckle is closely linked with leprechauns in Irish folklore. It hints at playful mischief, hidden treasure, and a little extra good luck wherever you go.
DIY Lucky Charm Jewelry Supplies Checklist
To make your lucky charm gummy jewelry, you only need a handful of basics, plus a few fun extras for texture and sparkle. Most of these can be found on Amazon or at a craft store.
Use this as a simple checklist and shop your stash first.
Core supplies for gummy style charms
- Silicone molds
Look for shapes like shamrocks, horseshoes, tiny pots, rainbows, and knot designs. - UV resin or two part epoxy resin
UV resin cures quickly under a UV lamp, which is great for small charms. Two part resin is better if you want to pour larger batches at once. - Translucent polymer clay
A translucent or frost clay gives that gummy candy effect once baked. - For color:
• Transparent liquid resin pigments for resin in shades like emerald green, gold, and soft pastels.
• Pastel polymer clay colors or a little chalk dust to tint your translucent clay base.
Texture and embellishments
- Gold foil flakes or chunky gold glitter
Perfect for pots of gold and emerald horseshoes. - Extra fine iridescent glitter
This gives the perfect sugar dusted look on clay pieces. - Clear liquid clay
Works like a glue for glitter on clay. Once baked, it becomes permanent.
Jewelry findings and assembly
- Necklace bases
Try colorful satin cords for a playful, sensory feel, or
gold plated cable chains for a more polished look. - Eye pins and jump rings
These connect your charms to your chains or cords. - Small jewelry pliers
Helpful for opening and closing jump rings cleanly.
Optional but nice to have
- Silicone crafting mat
Keeps your table clean and makes it easier to photograph your finished pieces. - Toothpicks and a small hand drill or pin vise
Great for popping bubbles in resin and adding holes in clay.
Save this list so you can come back to it whenever you need to restock or make another batch of charms.
The "secret ingredient" for the most realistic gummy jewelry. Cernit is widely considered the clearest translucent clay on the market, baking into a stunning frosted-glass finish. It’s soft enough to grab the "sugar" coating perfectly without needing extra glue!
DIY Lucky Charm Jewelry Master Tutorials
Both methods work beautifully for DIY Lucky Charm Jewelry, so you can mix glassy resin charms with sugar dusted clay pieces in the same project.
Master Tutorial 1: The Glassy Resin Method
Use this method for charms that you want to look like shiny, clear jelly candy. It is perfect for the Emerald Horseshoe, the Pot of Gold, and the Trinity Knot.
- Prep your space
Work in a well ventilated area, open plenty of windows, and protect your surface with a mat or parchment. Put on gloves so you are not getting resin on your skin. - Mix and color
If you are using UV resin, pour a small amount into a mixing cup. Add one tiny drop of transparent pigment at a time until you get a rich jelly color. Less is more here. You still want light to pass through. - Add shimmer and luck
For horseshoes and pots of gold, gently stir in gold foil or glitter. Work slowly so you do not create too many bubbles. - Pour into your molds
Fill each cavity slowly, right up to the top. Use a toothpick to nudge resin into corners and pop any visible bubbles. A quick pass with a heat gun on low can also help remove surface bubbles. - Cure
Place your mold under a UV lamp and cure according to the instructions, usually two to five minutes per side for small charms. If you use two part resin instead, follow the bottle directions and let it cure for 24 to 48 hours. - De-mold and finish
Gently pop each charm from the mold. If needed, you can lightly sand any sharp edges. Add an eye pin with a tiny drop of resin and cure again to lock it in place.
The “Warm Water Bath” Trick
For crystal clear, bubble-free resin, place your closed resin bottles in a bowl of warm (not boiling) water for 5-10 minutes before mixing. This thins the resin slightly, allowing bubbles to rise and pop instantly, giving you that perfect professional “glass” look.

For Master Tutorial 1, this is the exact kit needed to get that viral glassy finish. It includes 200g of crystal-clear, hard-type resin and a 22-bead UV lamp that cures charms in minutes. Perfect for bubble-free lucky horseshoes and shimmering pots of gold!
Master Tutorial 2: The Sugar Dusted Clay Method
This method is amazing if you love a soft, matte, sour gummy texture. It works beautifully for shamrocks, retro rainbows, and marshmallow shapes.
- Make your jelly base
Condition a piece of translucent polymer clay until it is soft and smooth. You can mix in a bit of translucent liquid clay to make it slightly softer and more candy like. - Add color
Tint the clay with a tiny bit of colored clay or pastel chalk. Go slowly so it stays slightly see through instead of turning opaque. - Shape or mold
Press the clay firmly into your silicone mold or shape it by hand. Smooth the surface with your finger so it is even and rounded. - The sugar secret
Brush on a very thin layer of clear liquid clay. While it is still wet, roll or sprinkle your charm in extra fine iridescent glitter or very fine sand. This creates that sugary coating. - Bake
Place your charms on parchment paper and bake at the temperature listed on your clay package. A lower temperature is usually best for translucent clay so it stays clear and does not brown. Let everything cool completely. - Drill and assemble
After baking, use a tiny drill bit to make a clean hole if your charm does not already have one. Add an eye pin and attach it to your chosen chain or cord.
The Flash-Freeze Hack
Translucent clay can get very soft and “mushy” as you handle it. If your charm is losing its shape while you apply the sugar coating, pop it in the freezer for 2-3 minutes. This firms up the clay instantly so you can handle it without leaving fingerprints or squishing the details.

This comprehensive starter kit is the perfect foundation for Method 2. With 50 vibrant colors and a full set of 19 sculpting tools, you’ll have everything needed to shape retro rainbows, lucky clovers, and nostalgic marshmallow charms. The non-toxic, oven-bake clay is easy to mold and provides the ideal base for the "Sugar Dusted" frosted finish!
Note: While this kit is amazing for your rainbow and solid-colored charms, don't forget to grab a dedicated block of Cernit Translucent White for those crystal-clear jelly effects!
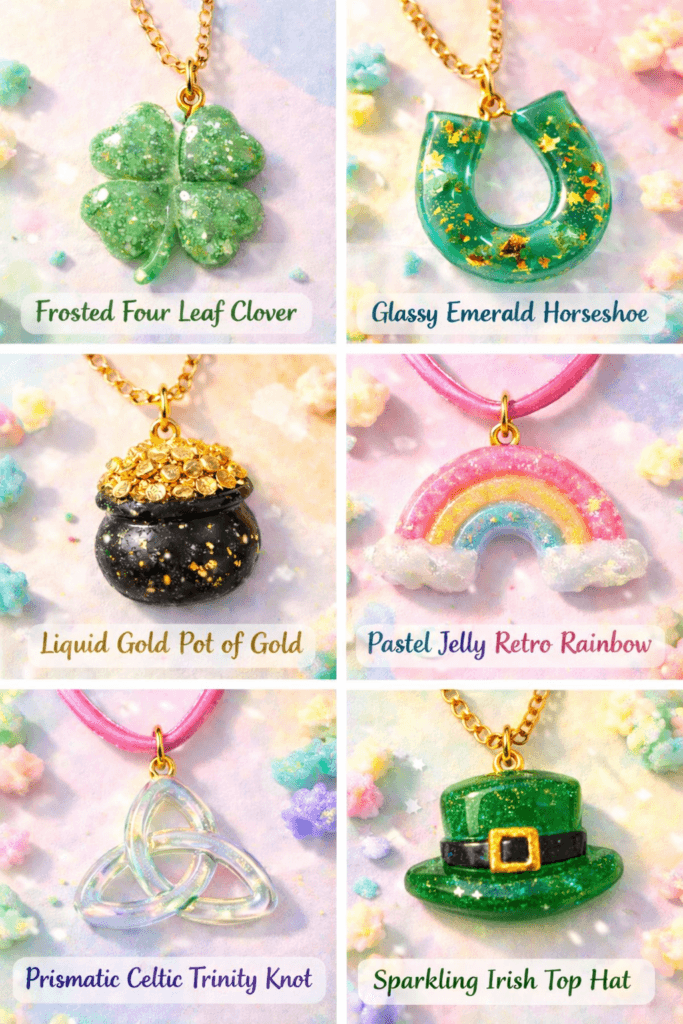
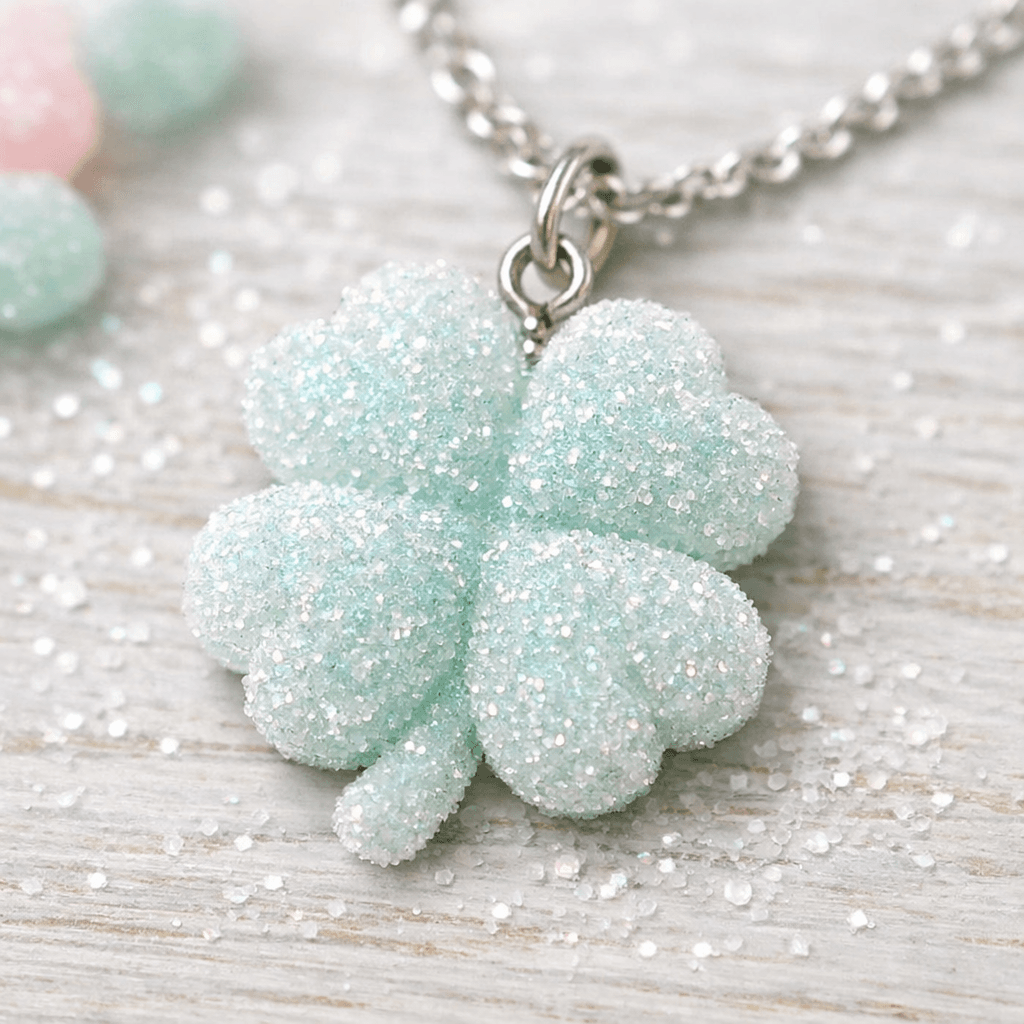
Charm Tutorial 1: Frosted Four Leaf Clover
Method: Sugar Dusted Clay
- Condition your translucent clay until soft and smooth.
- Press the clay into a shamrock mold or shape a simple clover by hand.
- Smooth the edges with your fingertip so it feels soft and rounded.
- Brush on a very thin layer of clear liquid clay.
- Sprinkle generously with iridescent extra fine glitter for that frosted look.
- Bake as directed, then let the charm cool and harden.
- Add an eye pin and attach it to a chain or satin cord.
Wear this one when you want a little extra luck on a busy day.
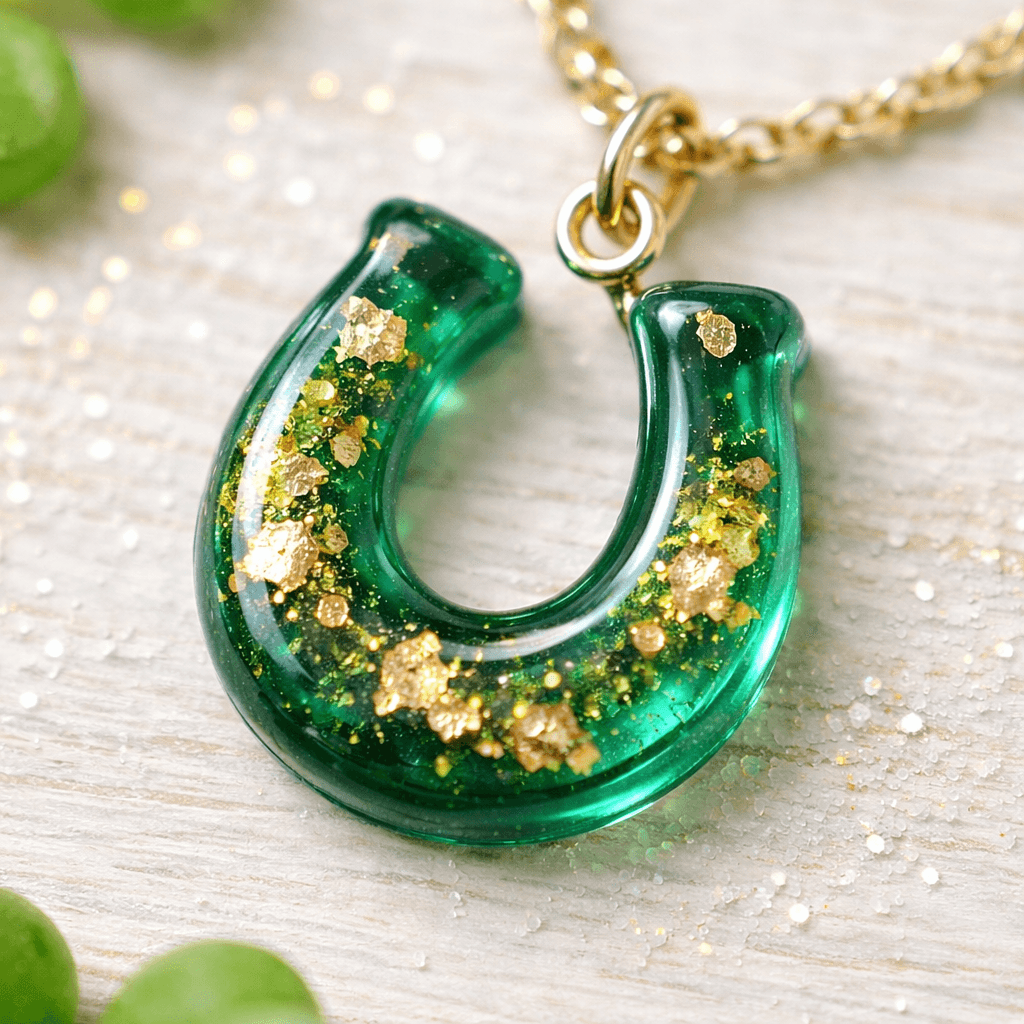
Charm Tutorial 2: Glassy Emerald Horseshoe
Method: Glassy Resin
- Mix clear UV resin with a drop of transparent emerald pigment.
- Stir in a pinch of gold foil flakes for a luxurious sparkle.
- Slowly pour the mix into a horseshoe mold.
- Use a toothpick to push resin into the tips and remove bubbles.
- Cure under a UV lamp until fully hardened.
- Demold gently and check the edges. If needed, sand lightly.
- Use a tiny drop of resin to secure a gold eye pin at the top, then cure again.
This charm is perfect if you want a subtle statement piece that still feels festive.
The Depth Trick
To make your horseshoe look like high-end “jewelry glass,” don’t mix the gold foil into the resin. Instead, pour a thin clear layer first, cure it for 30 seconds, then place the gold foil and pour the emerald resin on top. This creates a “floating” effect that adds incredible depth.
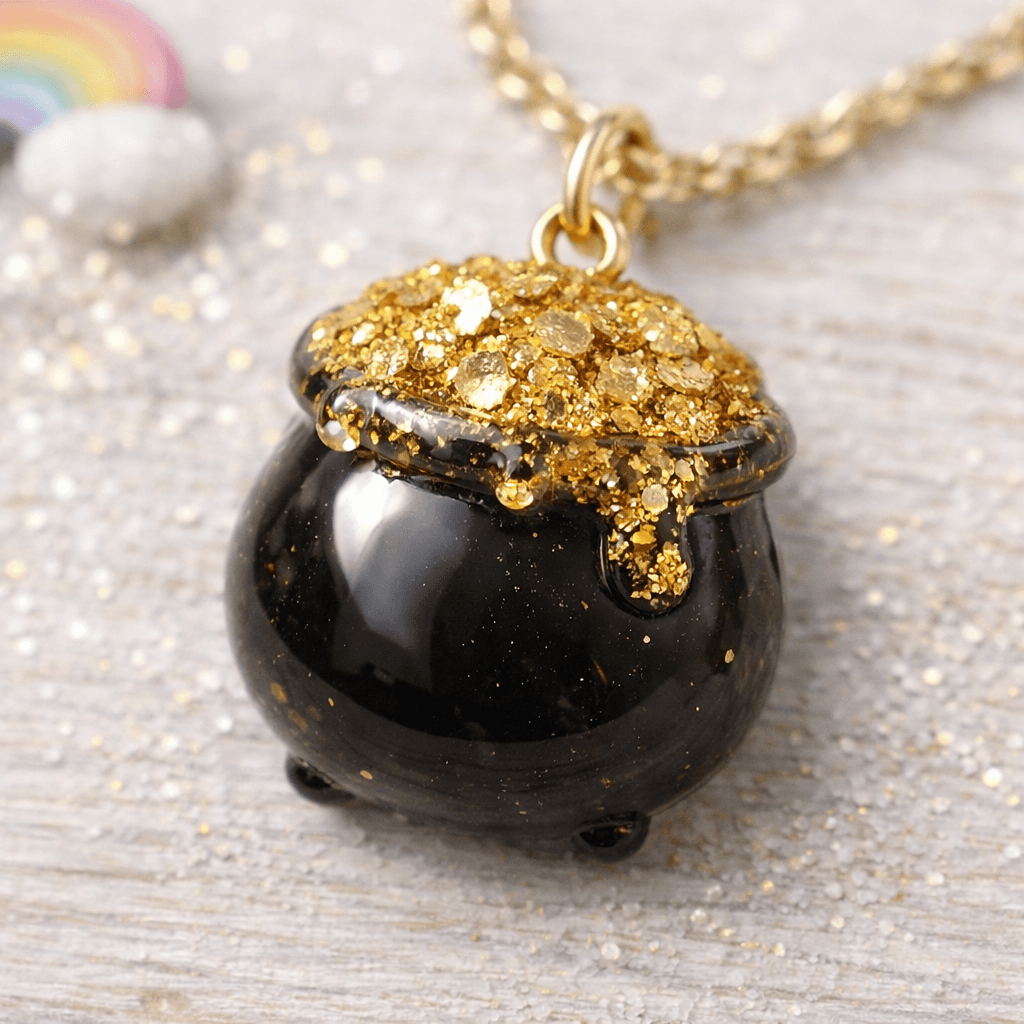
Charm Tutorial 3: Liquid Gold Pot Of Gold
Method: Glassy Resin
- Tint a small batch of resin with a tiny bit of black or very dark color.
- Fill the lower two thirds of a small pot or cauldron mold and cure. This becomes your pot.
- In a separate cup, mix clear resin with a generous amount of chunky gold glitter.
- Pour the gold mixture on top of the cured black base so it gently domes and slightly spills over the edge.
- Use a toothpick to shape the top so it looks like a pile of coins.
- Cure again until everything is fully set.
- Add an eye pin at the top for a necklace or bracelet charm.
This one photographs beautifully and looks amazing layered with a rainbow charm.
The No-Spill Dome
To get that perfect “overflowing gold” look without the mess, let your gold resin sit in the cup for 5-10 minutes after mixing. As it thickens, it becomes much easier to “pile” onto the black base to create a rounded dome that stays in place.
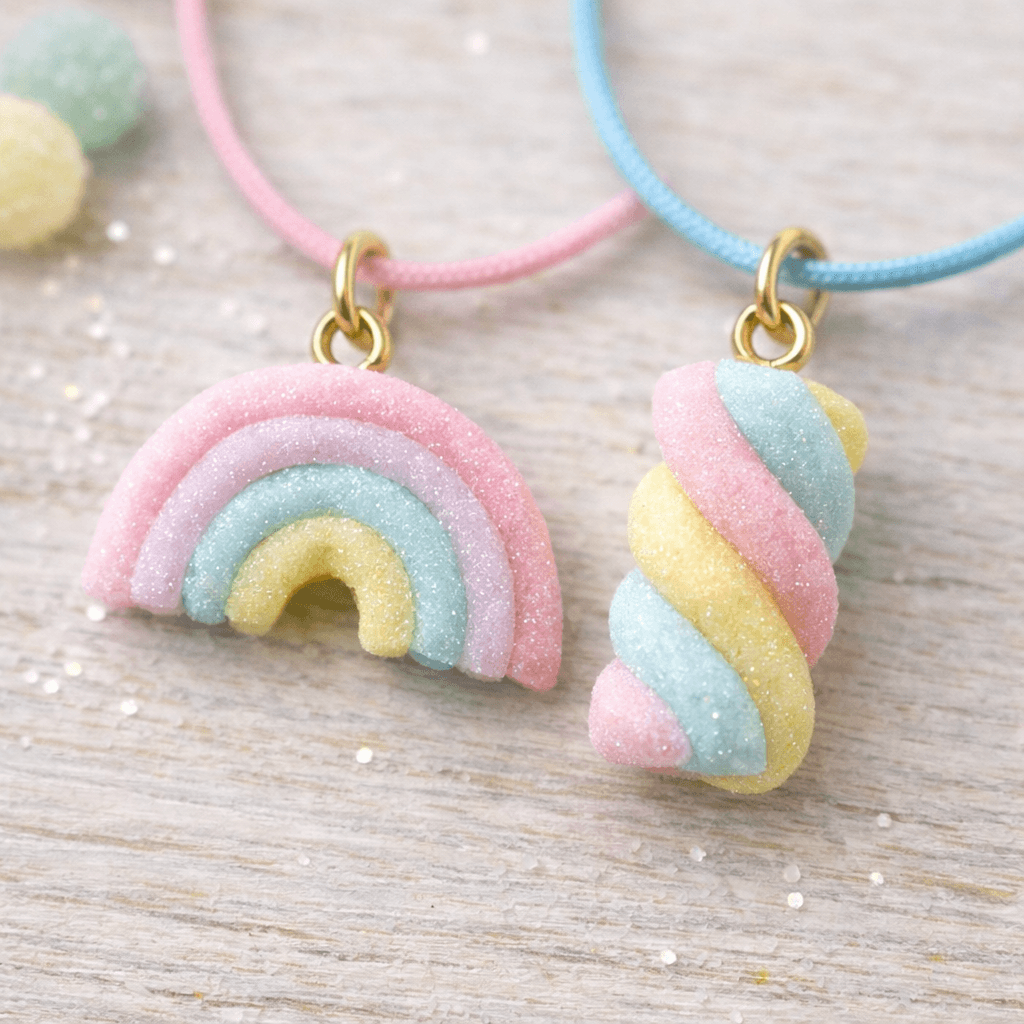
Charm Tutorial 4: Pastel Jelly Retro Rainbow Or Marshmallow
Method: Sugar Dusted Clay (with a twist)
- Divide your translucent clay into three small pieces.
- Tint each piece with a tiny bit of pastel pink, blue, and yellow.
- Roll each color into a thin snake and line them up side by side.
- Gently press and curve them into a simple rainbow shape.
- For a marshmallow effect, twist the colors together into a soft spiral instead.
- Keep the surface matte if you want a marshmallow look. Skip the glitter on this one.
- Bake as directed and let cool.
- Thread onto a colorful cord for a playful, sensory necklace.
These are so cute for kids and grown ups and they give a sweet nod to nostalgic cereal shapes.
The Seamless Blend
When rolling your clay “snakes,” use a tiny drop of baby oil or liquid clay on your palms. This prevents the colors from cracking as you curve them and helps the different colors bond together perfectly so they don’t separate after baking.
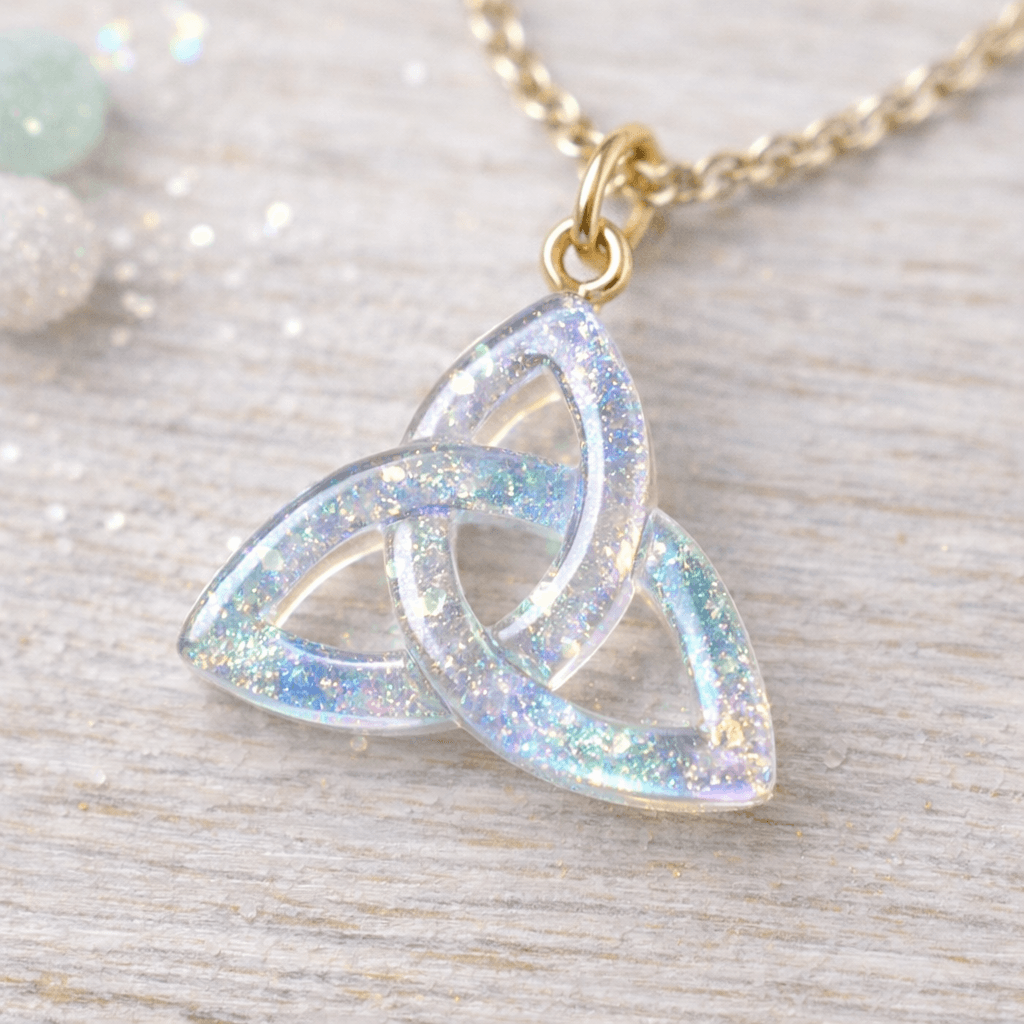
Charm Tutorial 5: Prismatic Celtic Trinity Knot
Method: Glassy Resin
- Mix clear UV resin in a small cup.
- Add a tiny amount of iridescent mica powder and stir until it shimmers.
- Carefully pour the resin into a trinity knot mold. Use a toothpick to guide it into all the small corners.
- Cure under a UV lamp until the charm is fully hard and no longer sticky.
- Demold gently. If you see any rough spots, sand them smooth.
- Thread the finished charm onto a delicate gold chain.
This one feels slightly more elegant and works beautifully as an everyday necklace, even after St. Patrick’s Day is over.
Avoid Air Traps
Bubbles love to hide in the corners of this knot. Before you pour the full amount of resin, use a toothpick to “paint” a thin layer into the deepest parts of the mold. This breaks the surface tension and ensures the resin reaches every tiny detail.
Charm Tutorial 6: Sparkling Irish Top Hat
Method: Sugar Dusted Clay
- Condition a piece of translucent or emerald green polymer clay until it is soft and smooth.
- Shape a small flat oval for the brim, then roll a short cylinder for the hat and press it gently on top.
- Smooth the sides and edges with your fingertip so the hat feels rounded and squishy, like a jelly candy top hat.
- Roll a very thin strip of darker clay to create the hat band and wrap it around the base of the crown.
- Add a tiny square of gold clay, gold foil, or metallic mica powder to mimic the buckle. Press it gently into the band.
- Brush a thin layer of clear liquid clay over the brim and edges, then sprinkle with extra fine iridescent glitter for a sugar dusted look.
- Bake as directed and let the hat cool completely before handling.
- Add an eye pin through the top or back of the hat and attach it to a chain or satin cord.
Wear this one when you want playful leprechaun energy and a hint of mischievous good luck.
The Perfect Buckle
Instead of trying to shape a tiny square of clay (which can be fiddly), wait until after the hat is baked. Use a gold metallic paint marker or a tiny drop of gold nail polish to “draw” the buckle on. It gives a much sharper, shinier finish that looks like real metal.

Frequently Asked Questions
Can I make these if I am a total beginner?
Yes. If you are brand new, I recommend starting with the Sugar Dusted Clay method. Clay is very forgiving and easy to adjust. If you want to try resin, start with a small UV resin kit so you can cure each charm in a few minutes.
What if I do not have a UV lamp?
You can still make these. Use two part epoxy resin instead of UV resin. It cures on its own over 24 to 48 hours. Or skip resin entirely and stick with polymer clay versions.
Are these necklaces durable for everyday wear?
Once resin is fully cured and clay is fully baked, the charms are quite sturdy. For clay, the most important thing is baking at the right temperature and time so the piece is strong and not brittle.
Can I use real candy inside resin?
You can, but there is a trick. Real candy needs to be sealed first with a clear spray sealer or similar coating. If you put it straight in the resin, the sugar can melt or discolor over time.
How do I get the sugar look to stay on the clay?
Brush a thin layer of clear liquid clay on your charm, then roll it in glitter or fine sand. When you bake it, the liquid clay hardens and locks everything in place.
Final Thoughts
And there you have it, friends. Your own collection of DIY Lucky Charm Gummy Jewelry that feels fun, personal, and very St. Paddy’s ready.
I love how these pieces capture the viral “Gimme Gummy” aesthetic while still feeling meaningful. You can wear a frosted shamrock for extra luck, layer a glassy emerald horseshoe over a sweater, or add a tiny pot of gold to your everyday necklace stack.
Remember, you do not have to make everything at once. Pick one charm to start, get comfortable with either resin or clay, then build your charm collection over time.
If you try this tutorial, I would love to see what you make. Tag me in your photos or leave a comment to share which symbols you chose and how you styled them.
Save this DIY Lucky Charm Jewelry tutorial for later so you can come back whenever you are ready to craft, and may your St. Patrick’s Day be full of gentle good luck and just the right amount of glitter. If you are in the mood for more easy projects like this, you can browse the Crafts page next for more feel good ideas. Happy creating. 🍀✨