
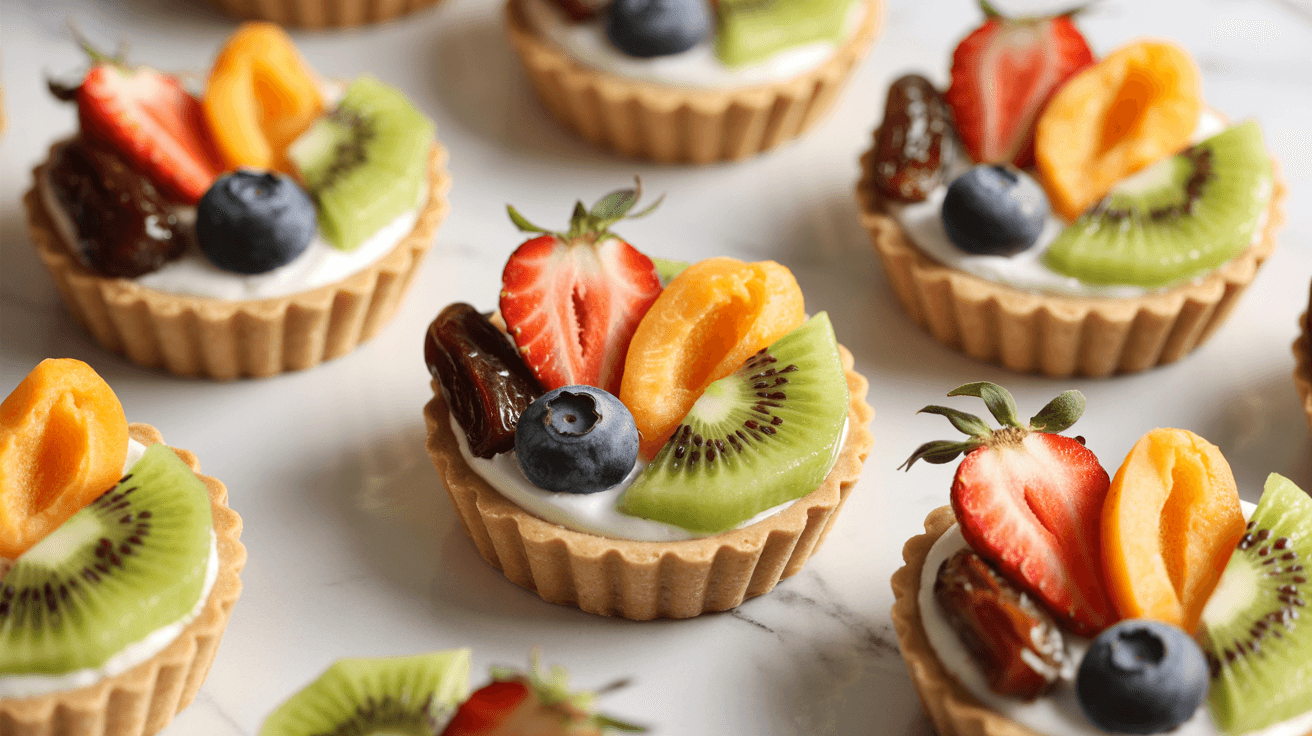
Looking for a delightful way to satisfy your sweet tooth? Try our Mini Vegan Fruit Tarts, the perfect no-bake treat to impress your friends and family! They look like something from a bakery case, but they are simple enough to make on a relaxed afternoon.
The crust is just nuts and dates pressed into small tart shells, and you can choose between two creamy fillings: a light coconut cream or a richer cashew cream. Then, when you top everything with fresh fruit, you get a bright, feel good dessert that is easy to share and does not feel heavy.
They are perfect for brunch, celebrations, or any day you want something pretty and fresh without turning on the oven. Best of all, you can mix and match the fillings and fruit so the tarts fit whatever season or occasion you have in mind.
Some of the links on this page are affiliate links, which means I may earn a small commission at no extra cost to you. Thank you for supporting HypeVine and helping me share cozy dessert recipes and finds with you! 🍓🍋🍇
What Makes These Mini Vegan Fruit Tarts So Good
- No baking needed. The crust firms up in the fridge, which keeps the process quick and fuss-free.
- Two filling options. Choose coconut cream for a light, airy texture or cashew cream for a richer, cheesecake-like feel.
- Whole-food ingredients. The crust is naturally sweetened with dates, and the fillings are dairy-free with minimal sugar.
- Customizable. Use any mix of berries, tropical fruit, or stone fruit. It’s a flexible, seasonal recipe.
- Mini size. Perfect for parties, easy to portion, and kid-friendly.
What You’ll Need
- For the crust:
- 1 1/2 cups raw nuts (almonds, walnuts, pecans, or a mix)
- 1 cup pitted Medjool dates (about 10–12), packed
- 1/4 teaspoon fine sea salt
- 1/2 teaspoon vanilla extract (optional)
- Zest of 1 lemon or orange (optional, for brightness)
- For the coconut cream filling (option 1):
- 1 (13.5-ounce) can full-fat coconut milk, chilled overnight
- 2–3 tablespoons maple syrup or agave
- 1 teaspoon vanilla extract
- 1–2 teaspoons fresh lemon juice
- Pinch of fine sea salt
- For the cashew cream filling (option 2):
- 1 1/2 cups raw cashews, soaked 4–6 hours or in hot water for 30 minutes, drained
- 1/3 cup coconut cream or full-fat coconut milk
- 3–4 tablespoons maple syrup or agave
- 1 teaspoon vanilla extract
- 2 tablespoons lemon juice
- Pinch of fine sea salt
- For topping:
- 2–3 cups fresh fruit: berries, kiwi, mango, peaches, nectarines, or citrus segments
- Optional: chopped mint, lemon zest, or a drizzle of maple syrup
- Tools:
- Food processor or high-speed blender
- Muffin tin with liners or small tart pans
- Mixing bowl and spatula

This professional-grade Vitamix immersion blender makes it easy to blend creamy soups, sauces, and smoothies right in the pot. The powerful 5-speed motor and stainless-steel blade create ultra smooth results in seconds while the slim design is comfortable to hold and simple to clean. A great pick if you want velvety white bean soups without hauling out a full-size blender.
Instructions
Prep and make the crust
- First, chill your tools. For the coconut cream version, place the can in the fridge overnight and chill a mixing bowl for at least 20 minutes before whipping.
- Next, make the crust. Add the nuts to a food processor and pulse until they are a coarse meal. Then add the dates, salt, vanilla, and zest if you are using it. Process until the mixture holds together when pressed. If it is too dry, add 1–2 extra dates. If it feels too sticky, add a tablespoon more nuts.
- After that, press the crust. Line a muffin tin with paper liners or lightly grease tart pans. Press 2–3 tablespoons of crust mixture into each cup, pushing it up the sides to form a shell. Aim for even thickness so they hold their shape.
- Then set the crusts. Chill the crusts in the fridge for 20–30 minutes while you make the filling. This step helps them firm up and release cleanly later.
Make the fillings and assemble the tarts
- While the crusts are chilling, make the coconut cream filling (option 1). Scoop the solid coconut cream from the chilled can, leaving the liquid behind. In the chilled bowl, whip the cream with maple syrup, vanilla, lemon juice, and a pinch of salt until light and fluffy. Taste and adjust the sweetness or lemon as needed.
- Alternatively, you can make the cashew cream filling (option 2). In a high-speed blender, combine the soaked cashews, coconut cream, maple syrup, vanilla, lemon juice, and salt. Blend until completely smooth and velvety, scraping down the sides as needed. If it is too thick, add a tablespoon of coconut milk at a time. Then chill the mixture for about 15 minutes to thicken.
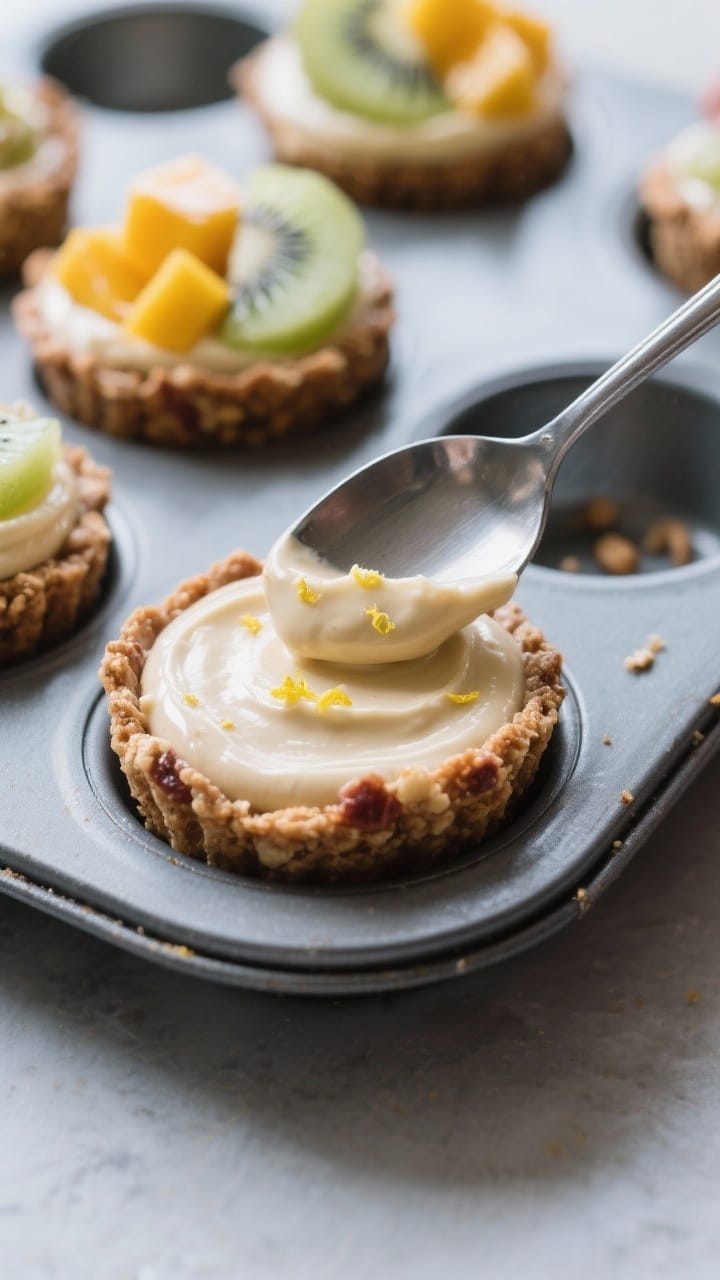
- Once the filling is ready, fill the shells. Spoon the filling into each crust, smoothing the tops with the back of a spoon. Do not overfill; leave a small lip for the fruit.
- Next, top with fruit. Arrange sliced strawberries, blueberries, kiwi, mango, or any fruit you like on top. Try to keep the pieces small so each bite has a good mix of textures and flavors.
- Then chill to set. Refrigerate the tarts for at least 45 minutes (longer for cashew cream) so they slice and lift cleanly. For a faster set, you can also pop them in the freezer for 15–20 minutes.
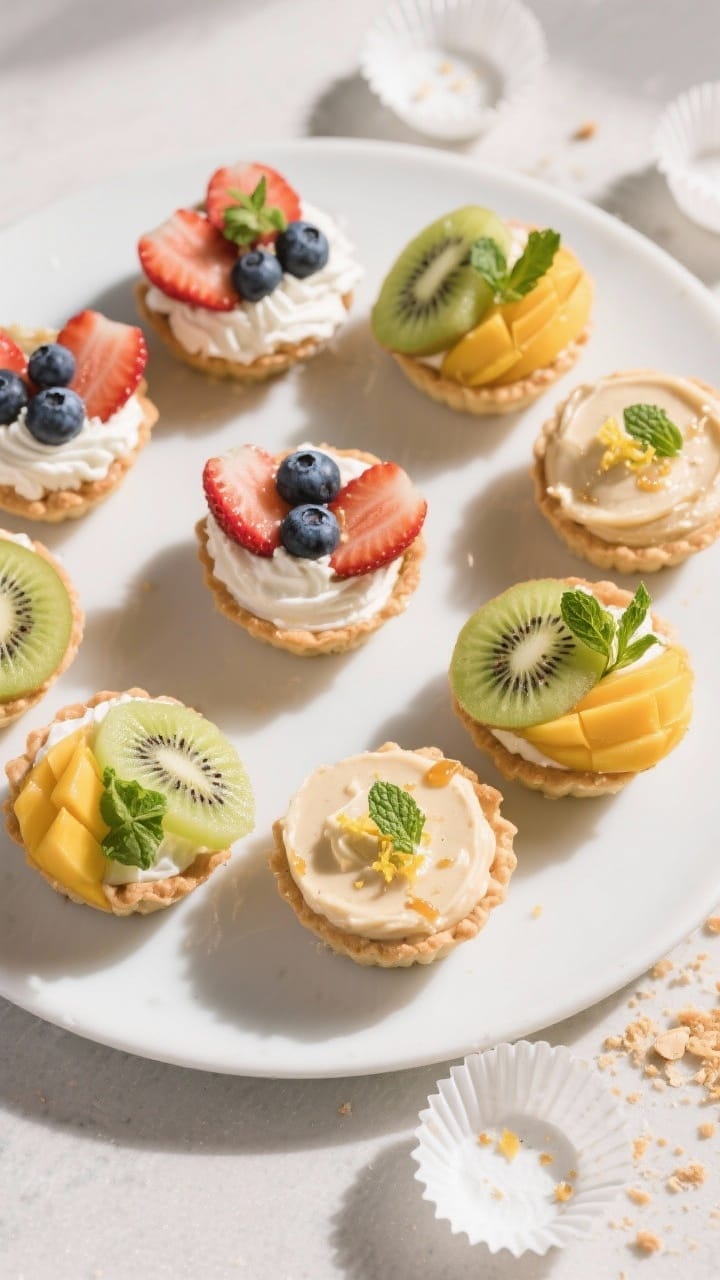
- Finally, serve. Remove the tarts gently from the liners or pans. For a pretty finish, add a sprinkle of lemon zest, chopped mint, or a light drizzle of maple syrup if you want extra shine.

These sturdy 4 inch mini tart pans have a removable bottom for easy release and a nonstick finish that keeps your crusts neat. The soft Champagne Gold appearance looks so pretty on the table and in photos. Tap “See Details” to check reviews and get a set for your next dessert night.
Keeping It Fresh
- Fridge: First, store assembled tarts in an airtight container in the fridge for up to 3 days. Add delicate fruit like bananas just before serving so they stay fresh.
- Freezer (crusts): The crusts on their own freeze well for up to 1 month. Simply freeze them empty, then fill and top with fruit on the day you plan to serve.
- Freezer (assembled tarts): Tarts made with cashew cream can also be frozen for 2–3 weeks. Thaw them in the fridge, then add fresh fruit right before serving for the best texture.
- Prevent soggy crusts: If you are using very juicy fruit, gently pat it dry with a paper towel first. You can also spread a thin layer of melted dark chocolate on the crusts and chill them to create a light moisture barrier before adding the filling.
Benefits of This Recipe
- Plant-based and dairy free. These tarts are fully vegan, so they work well for mixed-diet gatherings and guests with dairy sensitivities.
- Naturally sweetened. The crust uses dates for sweetness, and the fillings rely on maple syrup or agave, so the flavor stays gentle and balanced.
- Full of texture. You get a crunchy nut-and-date crust, a creamy filling, and juicy fruit on top, so every bite feels satisfying.
- Nutrient rich. Nuts bring healthy fats and a bit of protein, while the fresh fruit adds fiber, vitamins, and antioxidants.
- Make ahead friendly. You can prep the crusts and fillings in advance, then assemble and top with fruit closer to serving time.
Tips to Avoid Common Mistakes
Do not skip the salt and acid. A tiny pinch of salt and a bit of lemon juice make the flavors pop and keep the filling from tasting flat or overly sweet.
Chill the coconut milk well. Warm or only slightly chilled coconut milk will not whip properly. Make sure the can has been in the fridge overnight so the cream separates and firms up.
Blend the cashews until completely smooth. If the cashew cream is not fully blended, the filling will taste grainy. Keep blending and add a small splash of coconut milk if you need to loosen it.
Do not overprocess the crust. Stop blending as soon as the mixture starts to clump together. If you go too far, the nuts can turn into nut butter and the crust will feel greasy.
Go easy on the fruit. Piling on too much fruit can make the tarts collapse or leak juices. Aim for an even layer so each tart holds its shape.
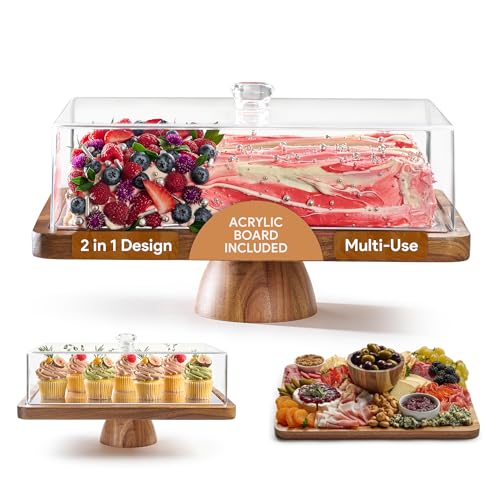
This acacia wood cake stand makes your mini fruit tarts look like a bakery display at home. The clear acrylic dome keeps everything fresh while still showing off the layers of crust, cream, and fruit, and the rectangular base doubles as a serving board for little desserts or charcuterie. Style it for brunch, parties, and Valentine’s dessert nights. 💗
Variations You Can Try
- Chocolate twist: Add 1–2 tablespoons of cocoa powder to the crust, or stir a little melted dark chocolate into the cashew cream for a richer, dessert-y feel.
- Spiced crust: Mix a pinch of cinnamon, cardamom, or pumpkin spice into the crust for a warm, cozy flavor.
- Tropical vibe: Use macadamia nuts in the crust and top the tarts with mango, pineapple, and a sprinkle of toasted coconut.
- Lemon berry: Add extra lemon zest to the filling and finish with blueberries and raspberries for a bright, tangy finish.
- Mocha moment: Stir 1 teaspoon of espresso powder into the cashew cream and top with shaved chocolate and cherries.
- Nut free option: Use seeds, such as sunflower and pumpkin, in place of nuts in the crust, and choose the coconut cream filling.
This sturdy 2-in-1 metal lemon squeezer helps you get every last drop of juice with almost no effort. It fits both lemons and limes, strains out the seeds, and is easy to rinse clean. Perfect for mixing up bright lemon crinkle cookie dough, dressings, and cocktails whenever you want fast, fresh citrus at home.
FAQs
Can I make these without a food processor?
Yes. You can use a high-speed blender for the cashew cream and pulse the crust carefully. If the crust is tricky to blend, chop the nuts finely by hand, mash the dates with a fork, then mix everything together in a bowl. It takes a little longer, but it still works.
Which filling is more stable for warm weather?
The cashew cream filling holds up better at room temperature, so it is the best choice for warm days or outdoor gatherings. If you expect heat, use cashew cream, chill the tarts well, and keep them cold until serving. Coconut cream can soften quickly when it is warm.
What if my dates are dry?
If your dates feel firm or dry, soak them in warm water for 5–10 minutes, then drain them well. This helps them blend smoothly and bind the crust. If the mixture still feels crumbly, add one more date and pulse again.
Can I reduce the sweetness?
Absolutely. You can use fewer dates in the crust (just make sure the mixture still holds together) and start with less maple syrup in the filling. Taste as you go and add a little more sweetener only if you want it.
How do I get the tarts out of the pan cleanly?
Use muffin liners or removable-bottom tart pans to make lifting easier. Chill the crusts before filling, and chill the assembled tarts again before removing. A small offset spatula or butter knife can help loosen the edges gently.
Is there a way to make them higher in protein?
Yes. You can add 2 tablespoons of hemp seeds to the crust or blend 1–2 tablespoons of unflavored or vanilla vegan protein powder into the cashew cream. If the filling thickens too much, add a small splash of coconut milk to smooth it back out.
Ka’Chava is my favorite plant-based all-in-one shake for busy mornings and snacky afternoons. This 5-flavor sample pack lets you try chocolate, vanilla, matcha, chai, and coconut acai, all made with protein, fiber, and 85+ superfoods. It blends up creamy and smooth with water or plant milk, so you get a filling, feel-good shake without a lot of effort.
Final Thoughts
These mini vegan fruit tarts are simple, bright, and endlessly flexible. The nut and date crust gives you a naturally sweet, sturdy base, and both fillings are creamy, satisfying, and dairy free.
Use the fruit you love, keep the steps chilled and relaxed, and you will end up with a dessert that feels special without any stress. They are easy to make ahead, easy to share, and just as delicious as they look on the plate.
Save this recipe for your next brunch, birthday, or warm weather get together so you can pull it out whenever you want a pretty little treat that feels fresh and light.