
Ready to give your home that soft, beachy summer glow? These DIY coastal crafts are five easy, feel-good projects you can make in one relaxed afternoon. Each one is simple, feel-good, and inspired by those light, sun-faded textures and calming ocean tones that make a space feel fresh and inviting.
Think natural materials, soft layers, and little handmade touches that instantly bring that breezy, coastal feeling into your everyday space.
Table of Contents
1. Sunlit Entryway with a Coastal Memory Jar
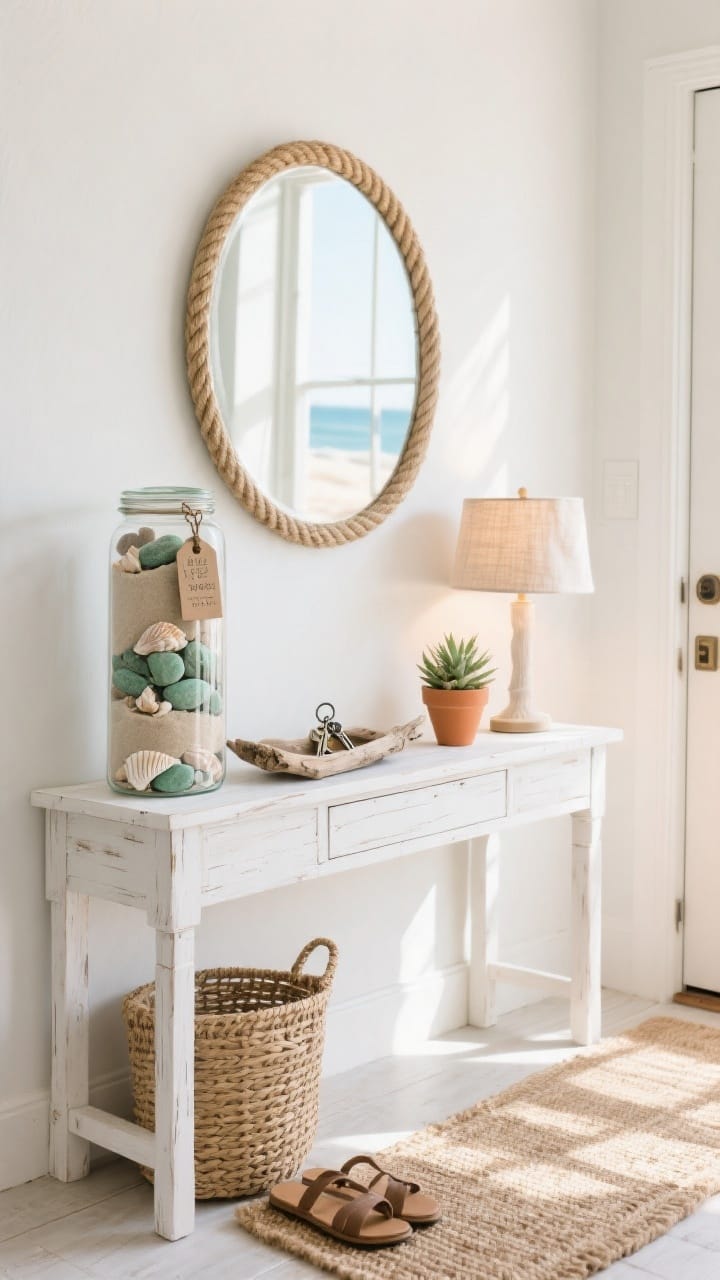
A coastal memory jar is one of the easiest ways to bring that soft, beachy feeling into your home. I love styling this on an entryway table, shelf, or nightstand because it feels personal without being fussy. Picture a clear glass jar layered with sand, small stones, seashells, and a tiny handwritten tag. It’s simple, sentimental, and instantly makes your space feel relaxed.
For a styled look, place it on a whitewashed console or wooden tray with a small plant, a candle, or a few extra shells nearby. Soft whites, pale beige, and sea-glass green keep the whole look light and breezy.
The Coastal Memory Jar
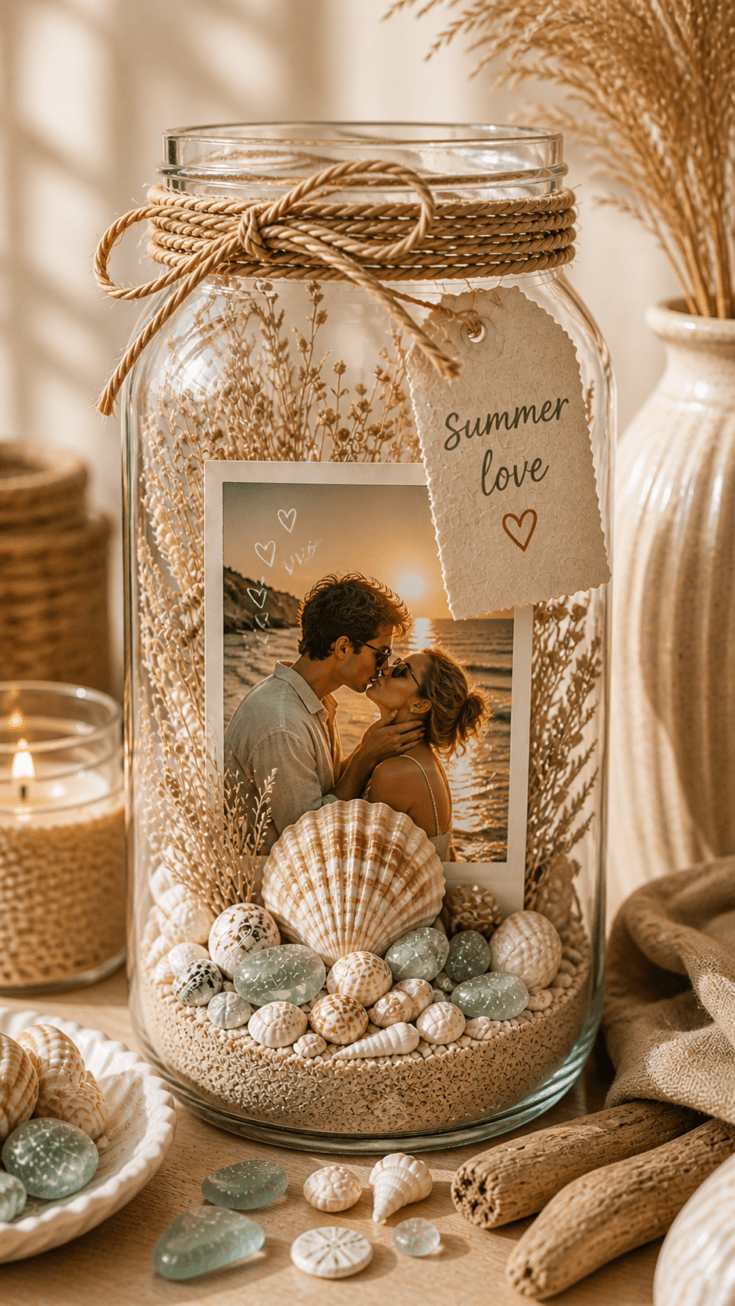
A soft, sentimental accent piece that captures the essence of the shoreline in a single jar.
Materials
- Sand
- Small shells
- Smooth stones
- Sea glass
- Clear glass jar
- Twine, ribbon, or string
- Small paper tag
- Pen or marker
- Tiny photo
- Map snippet
- Dried flowers
- Small charm
- Essential oil (for a light scent)
Tools
- Small funnel or spoon
- Paper towel (for cleanup)
Instructions
1. Start with a clean, dry jar: Make sure the inside is fully dry so the sand stays smooth and fresh.
2. Add your first layer of sand: Pour in about 1 inch of sand. Keep it even or tilt the jar slightly for a softer, natural look.
3. Layer in small stones and shells: Add smooth stones, tiny shells, or sea glass. Try not to overfill it, a little space makes it feel more airy.
4. Add a personal touch: Tuck in a small photo, a beach name, a map piece, or a handwritten note.
5. Create your tag: Write something simple like “Summer Vibes,” “Beach Day,” “Summer Love,” or the name of the place you visited.
6. Tie it together: Wrap twine or ribbon around the top of the jar and attach your tag.
7. Style it somewhere pretty: Place it on an entryway table, shelf, coffee table, or bedside table where it can catch the light.
Notes
Make It Your Own
- With friends: Add a photo from your beach day, plus sunglasses or a tiny trinket for that easy summer feeling.
- With your person: Use a romantic golden-hour photo and a small heart tag.
- With family: Add a vacation photo, location tag, or tiny handwritten memory.
- As a gift: Turn it into a keepsake with a shared photo or special place. Finish with ribbon, then add the beach name and date on the bottom of the jar.
Tip: Use a taller jar if you want it to feel more like a statement piece. Adding a driftwood tray underneath gives the arrangement a finished, professional look.
Shop the Essentials: Coastal Memory Jar
These easy supplies help you recreate this part of my DIY coastal crafts post with a soft, beachy finish.
As an Amazon Associate, I may earn from qualifying purchases at no extra cost to you. Thank you for supporting HypeVine!
2. Calm Coastal Living Room with a Driftwood Wall Hanging
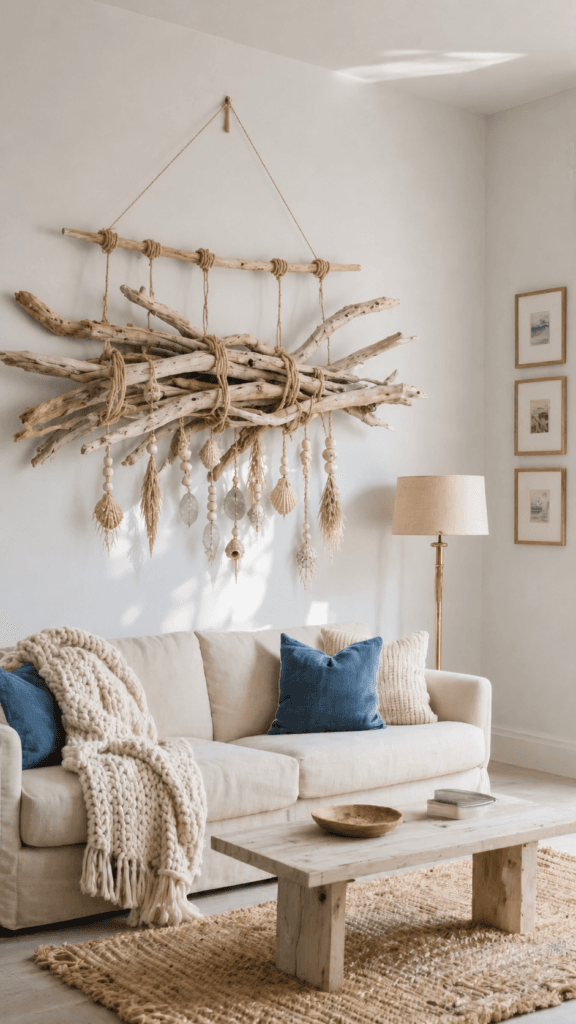
A driftwood wall hanging is one of those pieces that instantly makes a space feel calm and lived-in. I love building a whole living room look around it, it adds that soft, organic texture without feeling overdone.
Picture it above a simple linen sofa in sandy beige, with a chunky knit throw and a few weathered blue pillows. Add a light wood coffee table and a woven rug, and everything starts to feel relaxed and beachy in the best way.
Driftwood Wall Hanging
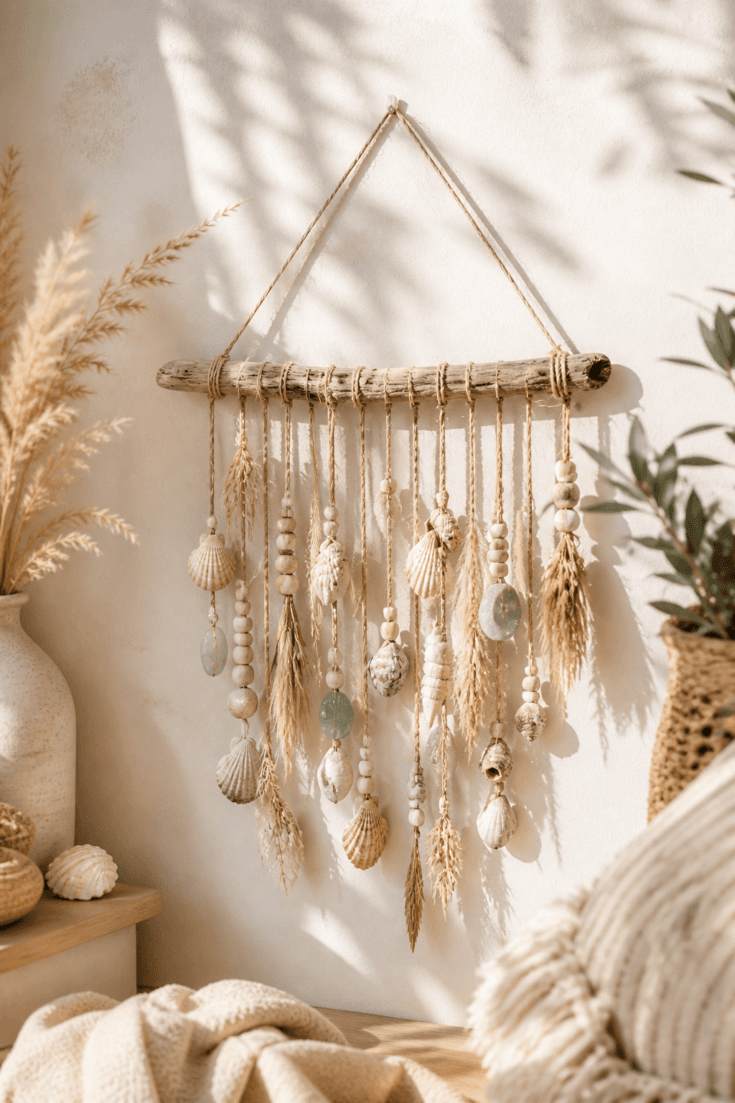
A driftwood wall hanging is an easy way to add soft, coastal texture to your space without it feeling overdone. It’s relaxed, beginner-friendly, and looks beautiful above a sofa, bed, or entryway.
Materials
- Driftwood pieces or one long piece (or a sturdy branch)
- Twine, jute, or thin rope
- Small shells or sea glass (optional)
- Wooden beads (optional)
- Dried grasses or pampas (optional)
- Feathers or soft fabric strips (optional)
Tools
- Scissors
- Optional: hot glue or craft glue
- Optional: small hand drill (pin vise)
Instructions
1. Start with your base: Use one longer piece of driftwood or a sturdy branch. Wipe it clean and let it dry.
2. Cut your strings: Cut several pieces of twine in different lengths for a soft, layered look.
3. Attach the strings: Tie each piece onto the driftwood using a simple knot or loop. Space them out so it feels balanced.
4. Add your details (optional): Add beads, tie on shells or sea glass, or tuck in dried grasses or fabric strips for extra texture.
5. Adjust the shape: Let some strands hang longer than others so it looks natural, not too perfect.
6. Add a hanging loop: Tie a longer piece of twine across the top so you can hang it on the wall.
7. Hang and style: Place it above a sofa, bed, or entryway where it can catch soft light.
Notes
Easy Supply Swap:
No driftwood? Use a branch or wooden dowel.
No shells? Skip them or use beads only.
No twine? Try yarn or ribbon for a softer look.
How to Attach Shells or Sea Glass:
Wrap + tie: Wrap twine around the piece and tie it at the top for a simple handmade look.
Glue method: Use a small amount of hot glue or craft glue to attach pieces to the string.
Thread (if pre-drilled): Slide shells or beads onto the string and tie a knot underneath.
Using a Jewelry Tool Kit:
If you want a more polished look, drill a small hole near the edge, then thread your twine through and tie. Use light pressure and take your time.
Little Styling Tips:
Stick to neutral tones for a soft, relaxed feel.
Mix textures like wood, shells, and fibers.
Keep it slightly imperfect, that’s what makes it feel special.
Pair it with linen, wood, and woven textures for a cohesive look.
Shop the Essentials: Driftwood Wall Hanging
Grab these simple supplies to make this DIY coastal crafts wall piece feel soft, textured, and effortless.
As an Amazon Associate, I may earn from qualifying purchases at no extra cost to you. Thank you for supporting HypeVine!
3. Serene Bedroom with Hand-Painted Seashell Decor
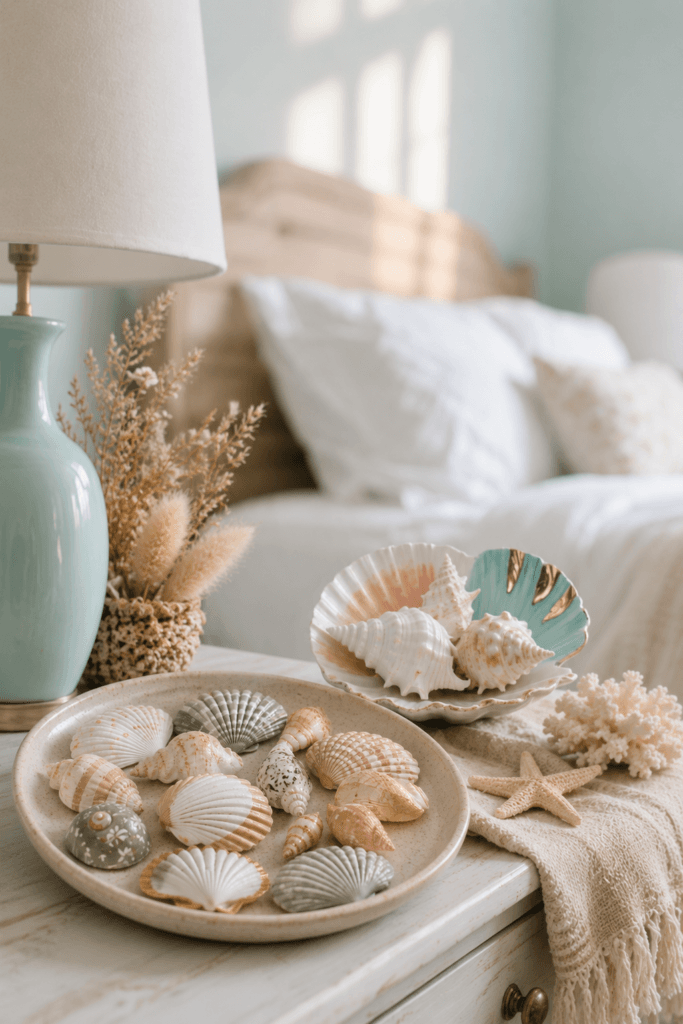
This one is all about those gentle, beachy tones that make a space feel calm and relaxed. I love placing a few hand-painted shells on a nightstand or dresser, it’s such a small detail but it makes everything feel a little more special.
Picture a light, airy bedroom with soft white bedding, a gauzy throw, and a few shells in pearly white, muted coral, and pale aqua sitting in a small dish. It’s simple, but it adds that quiet, coastal touch.
Painted Seashell Decor
A quick, relaxing DIY that adds a gentle coastal touch to your space. Hand-paint a few shells in soft beachy tones and style them in a small dish on a nightstand, dresser, or shelf for an easy detail that feels calm and special.
Materials
- Seashells (any shape or size)
- Acrylic paint (soft, neutral, or beachy tones)
- Small paintbrush
- Paper towel or cloth
- Gold or metallic paint (optional)
- Paint pen (optional, for fine details)
- Clear sealant (optional, for a soft finish)
- Small dish or tray (optional, for display)
Tools
- Small paintbrush
- Paper towel or cloth
- Optional: cotton swab or sponge (easy swap)
Instructions
1. Clean your shells: Rinse and dry them fully so the paint sticks smoothly.
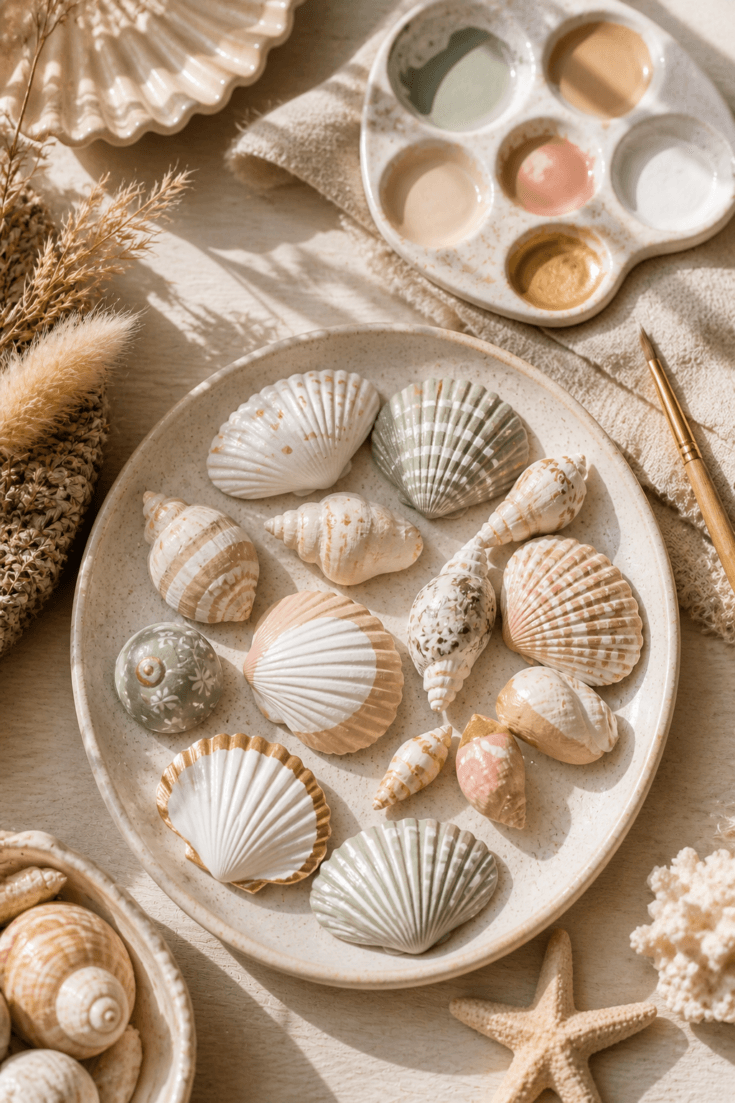
2. Choose your colors: Soft tones like white, beige, pale blue, or muted pink feel calm and beachy.
3. Apply a light first coat: Use thin layers so some of the natural shell texture still shows through.
4. Build up color slowly: Add a second light coat if needed, letting each layer dry in between.
5. Add simple details (optional): Use a paint pen or a touch of metallic paint for fine lines or soft edges.
6. Let them dry completely: Give them a few minutes to fully set.
7. Seal (optional): Add a clear coat if you want a slightly glossy or longer-lasting finish.
8. Style your shells: Place them in a small dish, on a nightstand, or on a shelf where they can catch the light.
Notes
Easy Supply Swap:
No brushes? Use a cotton swab or sponge.
No paint set? Use a paint pen for simple designs.
Want less mess? Stick to one or two colors only.
Make It Your Own:
Minimal + neutral: Stick to whites and sandy tones for a soft, calm look.
Soft color blend: Use pale coral, seafoam, or light blue for a beachy feel.
Subtle shimmer: Add a touch of gold along the edges.
Giftable: Wrap a few in a small box or bag for a sweet handmade gift.
Little Styling Tips:
Use thin layers instead of thick paint.
Stick to 2 to 3 colors max for a clean look.
Let some of the natural shell show through.
Display in a small dish or tray for an easy, styled look.
Shop the Essentials: Painted Seashell Decor
Everything you need for this calming DIY coastal crafts detail, soft paint, simple tools, and an easy display.
As an Amazon Associate, I may earn from qualifying purchases at no extra cost to you. Thank you for supporting HypeVine!
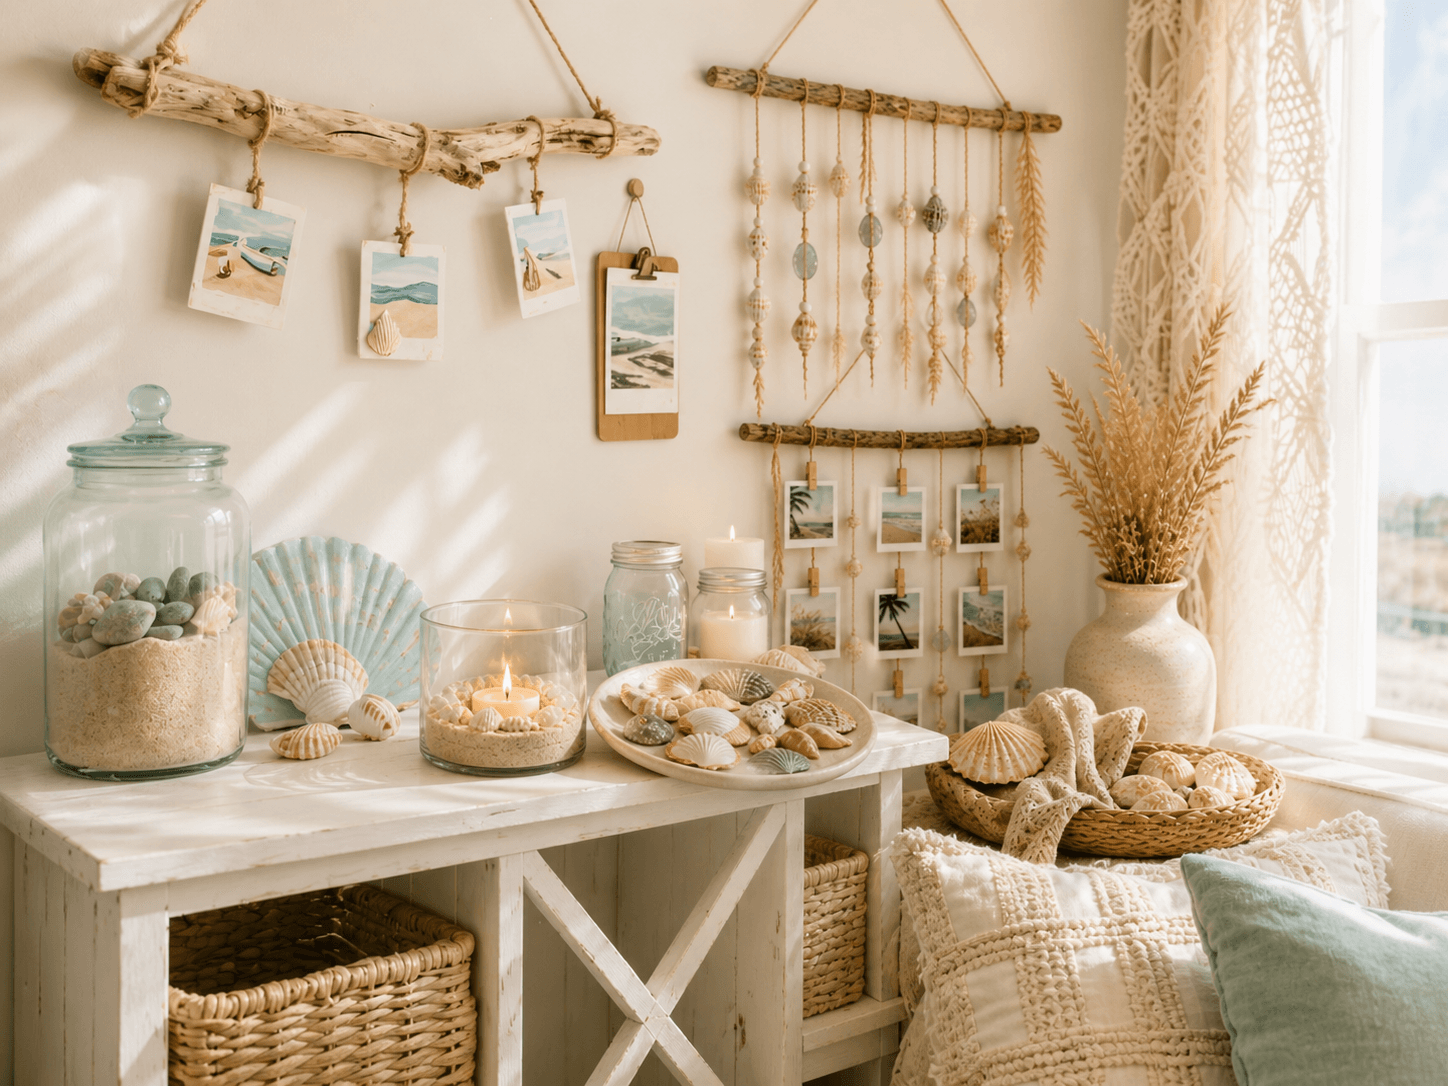
4. Breezy Dining Nook with Sand-and-Candle Mason Jars
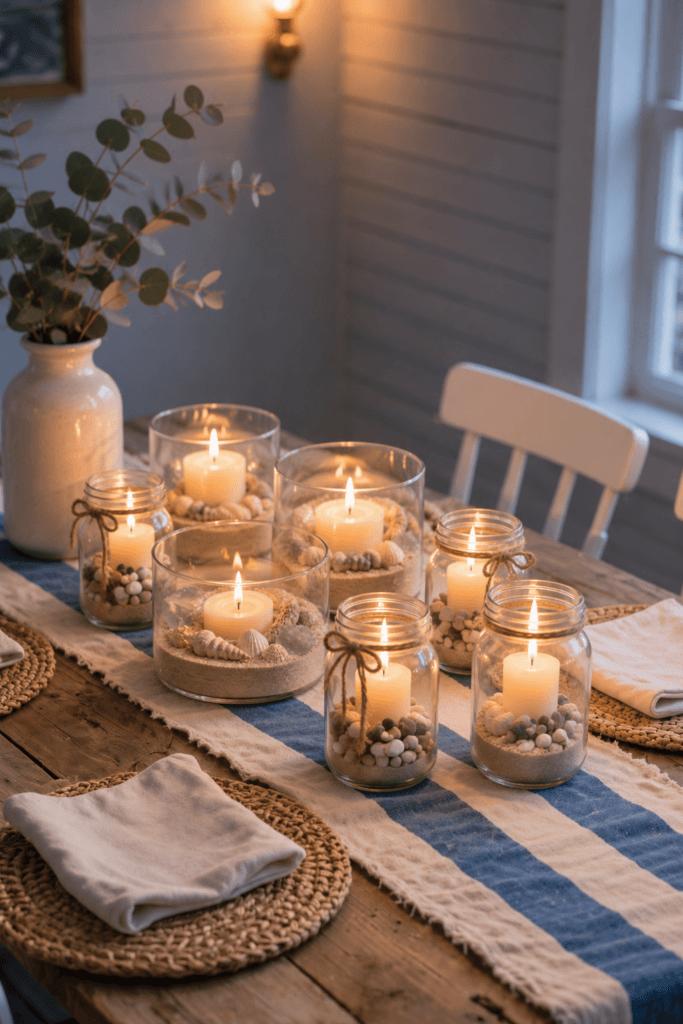
This is one of the easiest ways to create that warm, beachy glow at home. I love using a few mason jars as a simple centerpiece, it instantly makes a table feel more inviting without a lot of effort.
Picture a light-filled dining nook with a wood table, a soft striped runner, and a few candle jars glowing in the evening. It feels relaxed, a little coastal, and perfect for slow dinners or weekend brunch.
Sand + Candle Mason Jar Decor
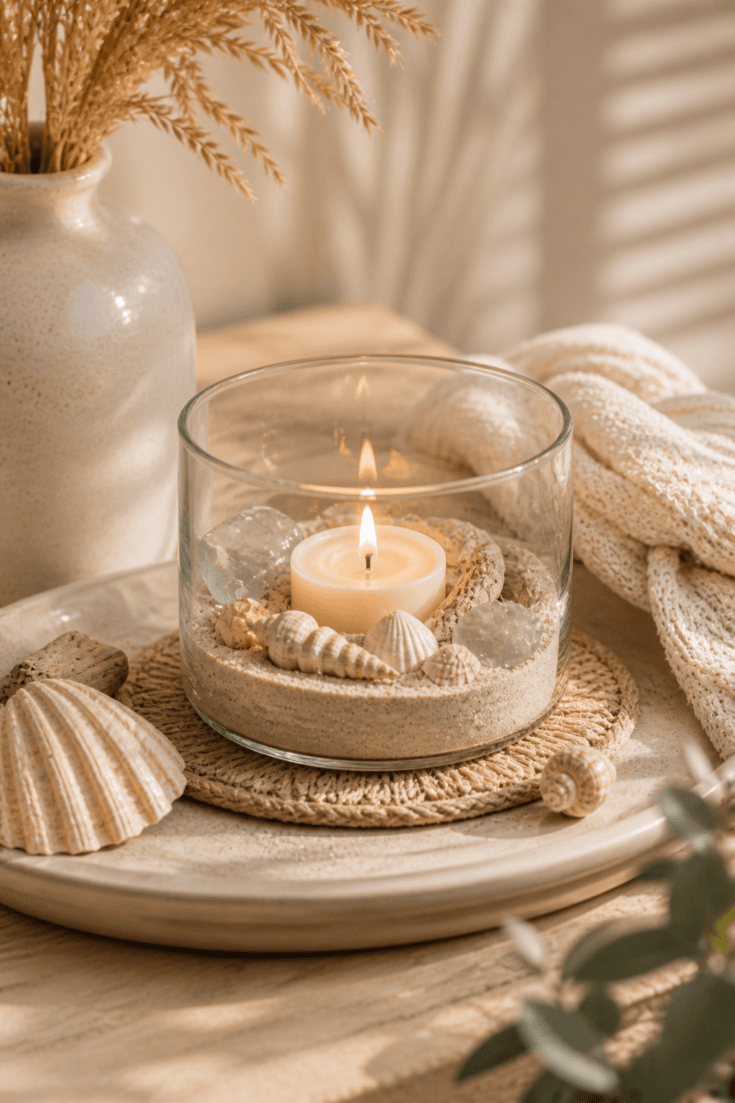
An easy, beachy centerpiece that adds a warm glow in minutes. Fill a few jars with sand, nestle in tea lights, and finish with shells or sea glass for a relaxed coastal look that feels inviting on any table.
Materials
- Sand (or Epsom salt or sugar)
- Small shells or pebbles (optional)
- Sea glass (optional)
- Mason jars or small glass containers
- Tea light or votive candles
- Twine or hemp cord (optional)
- Eucalyptus or greenery (optional)
- Table runner or tray (optional, for styling)
Tools
- None required
- Optional: spoon or small funnel (for pouring sand)
Instructions
1. Start with your jars: Make sure they’re clean and completely dry.
2. Add your base layer: Fill each jar about 1/3 full with sand.
3. Place the candle: Nestle a tea light or votive gently into the sand so it sits securely.
4. Add small accents (optional): Sprinkle in a few shells, pebbles, or sea glass around the candle.
5. Tie a simple detail (optional): Wrap twine or hemp cord around the rim and tie a small bow.
6. Create a cluster: Group 2 to 3 jars together for a softer, layered glow.
7. Light and enjoy: Perfect for evenings, dinner tables, or a calm cozy corner.
Notes
Easy Supply Swap:
No sand? Use Epsom salt or sugar.
No shells? Use small stones or keep it minimal.
No mason jars? Use any glass cups or bowls.
Make It Your Own:
Minimal + clean: Just sand and a candle for a calm, simple look.
Beachy + textured: Add shells and sea glass.
Soft + styled: Place on a tray with greenery or a runner.
Entertaining ready: Use a few jars as a centerpiece for brunch or dinner.
Little Styling Tips:
Use a striped runner in soft blue and ivory for an easy coastal feel.
Add linen napkins and woven placemats for texture.
Mix jar heights for visual interest.
Pair with wood and ceramic pieces for a relaxed finish.
Shop the Essentials: Sand + Candle Mason Jars
A quick centerpiece supply list for this DIY coastal crafts glow, simple, safe, and so inviting.
As an Amazon Associate, I may earn from qualifying purchases at no extra cost to you. Thank you for supporting HypeVine!
5. Coastal Office Corner with a Beachy Hanging Photo Clip Board
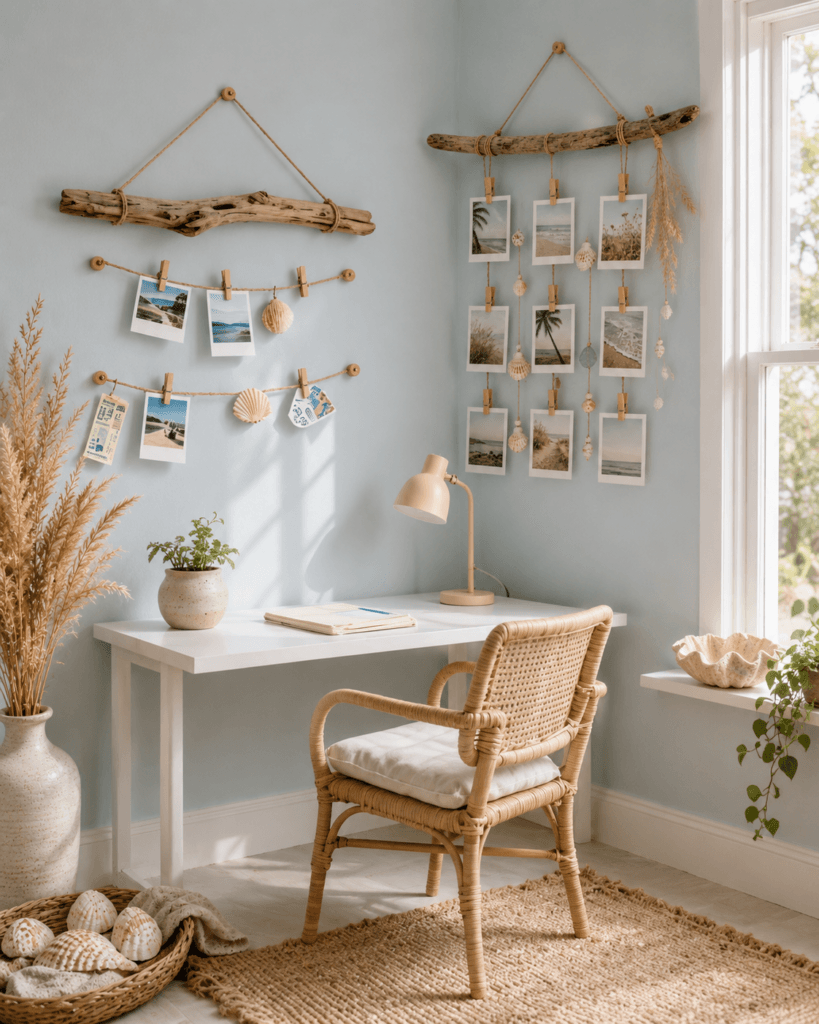
This one is such a lovely way to bring your memories into your everyday space. I love using this in a little work corner or desk area, it makes everything feel more relaxed and a little more “you.”
Picture a piece of driftwood with soft twine lines hanging down, clipped with beach photos, little notes, and maybe a few shell details. It’s simple, but it adds so much personality.
Set it above a clean desk with soft tones like pale blue, white, and natural wood, and it instantly feels calm and inspiring.
Beachy Photo Clip Board
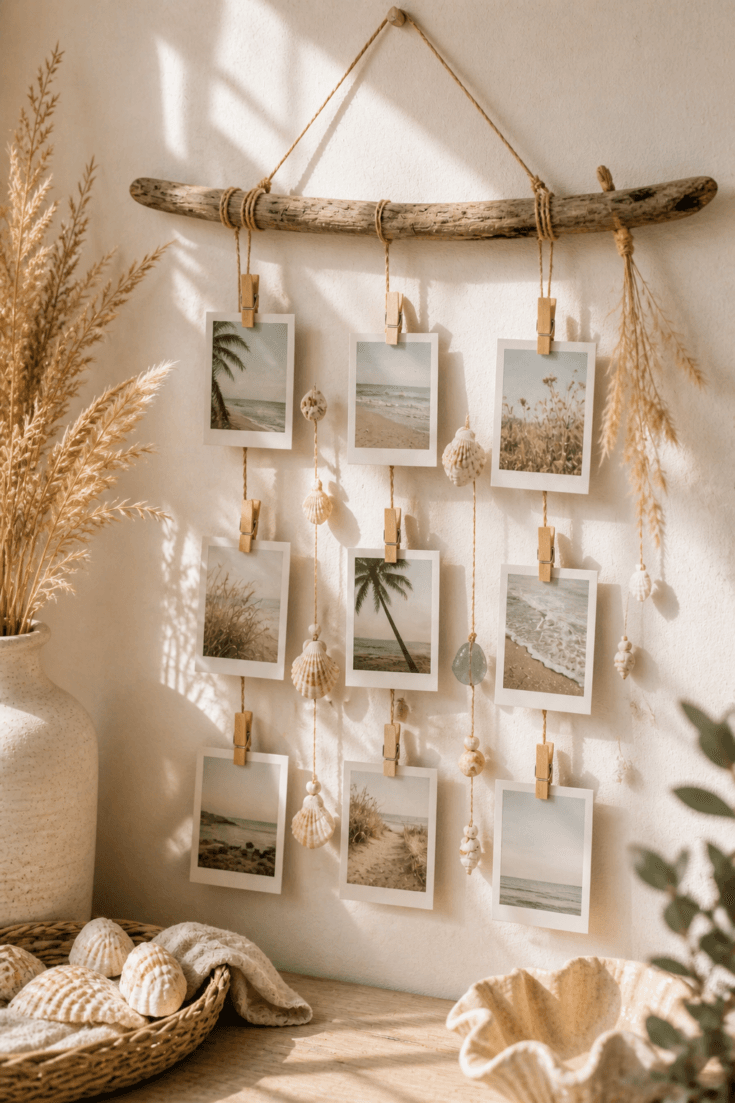
A simple, personal DIY that turns beach memories into easy wall decor. Add twine lines to driftwood (or any sturdy stick), clip on photos and little notes, and hang it above a desk or cozy corner for a relaxed, coastal touch.
Materials
- Driftwood or a sturdy stick (or a branch, dowel, or hanger)
- Twine or string
- Mini clips (clothespins work perfectly)
- Small shells (optional)
- Printed photos or Polaroids (optional)
- Postcards or notes (optional)
- Small beads or charms (optional)
- Eye screws (optional, for a more secure setup)
Tools
- Scissors
- Optional: small screwdriver (for eye screws)
Instructions
1. Start with your base: Use a piece of driftwood or a sturdy stick. Wipe it clean and let it dry.
2. Attach your hanging strings: Cut 2 to 3 pieces of twine and tie them across the driftwood so they hang down vertically.
3. Optional: secure with eye screws: If you want a more structured look, screw small eye hooks into the wood, then tie your twine to the hooks.
4. Add a top hanging piece: Tie a longer piece of twine across the top so you can hang it on the wall.
5. Clip your photos and notes: Use mini clips to attach photos, tickets, postcards, or little notes.
6. Add small details (optional): Tie on a shell, bead, or charm for a soft coastal touch.
7. Adjust spacing: Let everything hang a little unevenly so it feels relaxed and natural.
8. Hang and style: Place it above your desk, in a workspace, or in a bedroom corner.
Notes
Easy Supply Swap:
No driftwood? Use a branch, dowel, or even a hanger.
No clips? Use tape, or tuck photos into the string.
No printed photos? Use quotes, notes, or postcards.
Make It Your Own:
Beach memories: Add vacation photos or snapshots from summer days.
Personal moments: Mix in candid photos or meaningful notes.
Quotes + inspiration: Add affirmations or little reminders.
Giftable idea: Make one for a friend with shared memories.
Little Styling Tips:
Pair it with a small plant or ceramic piece for a calm desk setup.
Keep your palette soft with pale blue, white, and natural wood tones.
Mix textures like twine, wood, and paper.
Don’t overcrowd it, leave a little space between items.
Shop the Essentials: Beachy Photo Clip Board
A simple supply list to build this personal DIY coastal crafts display for your desk, entryway, or calm corner.
As an Amazon Associate, I may earn from qualifying purchases at no extra cost to you. Thank you for supporting HypeVine!
Your Soft Summer Reset with DIY Coastal Crafts
These simple DIYs are such an easy way to slow down and add a little beauty to your space. Each one is relaxed, approachable, and something you can finish in an afternoon without overthinking it.
Pick the one that feels right for you, or try a few and mix them throughout your home. Whether you’re bringing in memories from a beach day or just creating a calm, coastal corner, these little touches make everything feel lighter and more inviting.
Save this for later, or come back to it the next time you want a soft, creative reset at home.