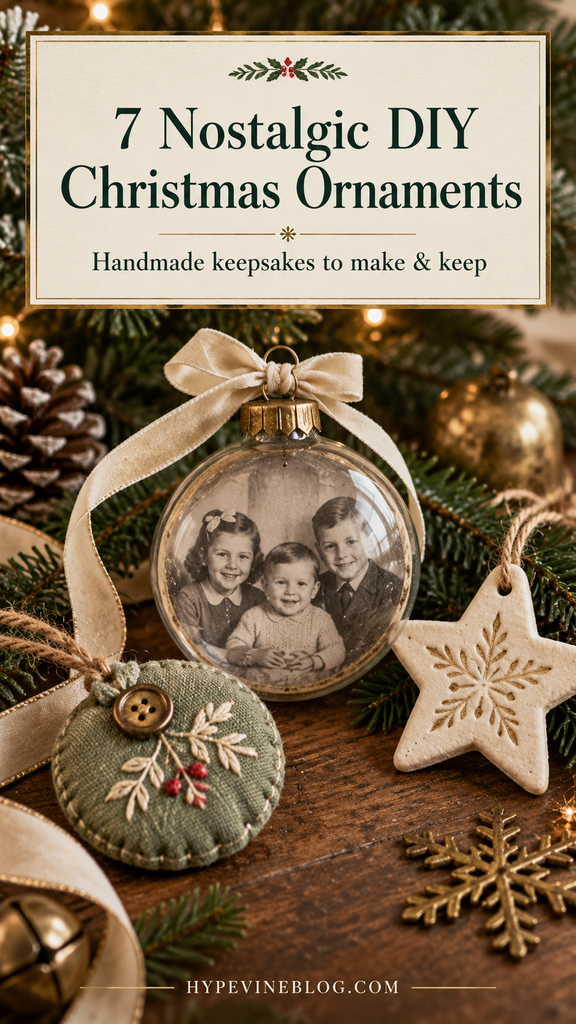
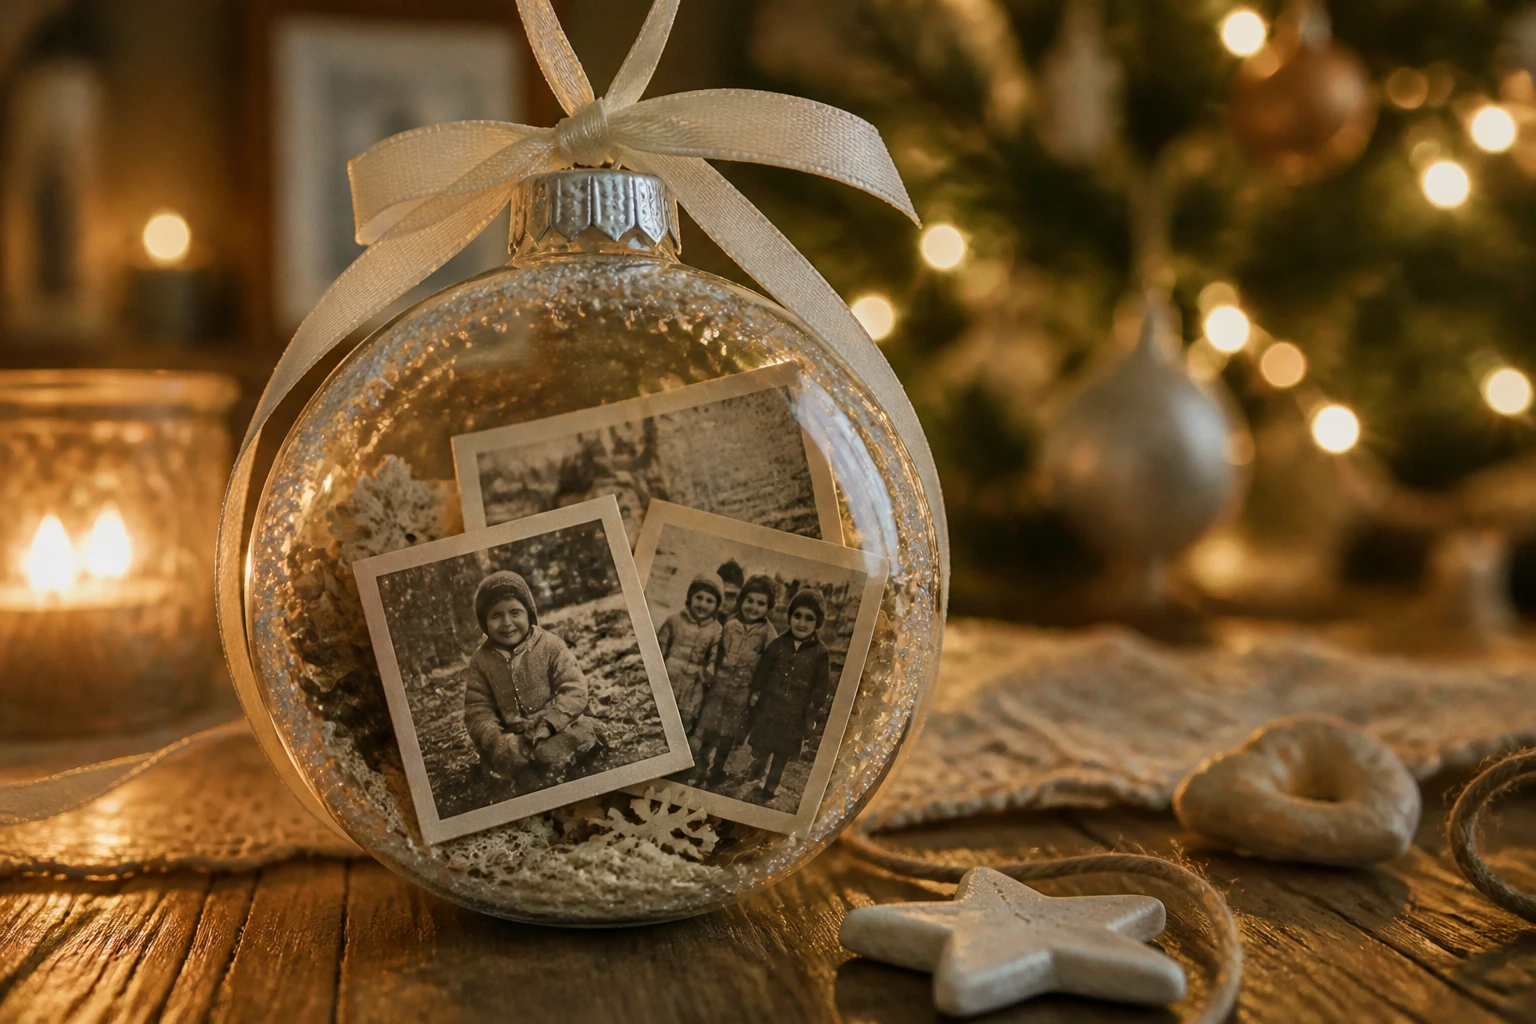
Nostalgic DIY Christmas ornaments bring a little family history to the tree, from a favorite photograph to a handwritten recipe or a button saved from a sewing tin. These seven ideas pair simple materials with details you will enjoy unpacking year after year.
Start with a photo bauble or recipe scroll for an easy afternoon project. Salt dough needs drying time, and the resin keepsake is an adults-only option for a more involved crafting session. You can jump to the printable craft cards when you are ready to gather your supplies.
Table of Contents
Affiliate links included. As an Amazon Associate, HypeVine earns from qualifying purchases at no extra cost to you.
Before you begin: Work with copies of photos, letters, and recipes. Keep small parts and hanging loops away from pets and young children, and follow the labels on paints, glues, and sealers. The finished images are styling inspiration; your handmade versions can be simpler.
1. Vintage Photo Baubles
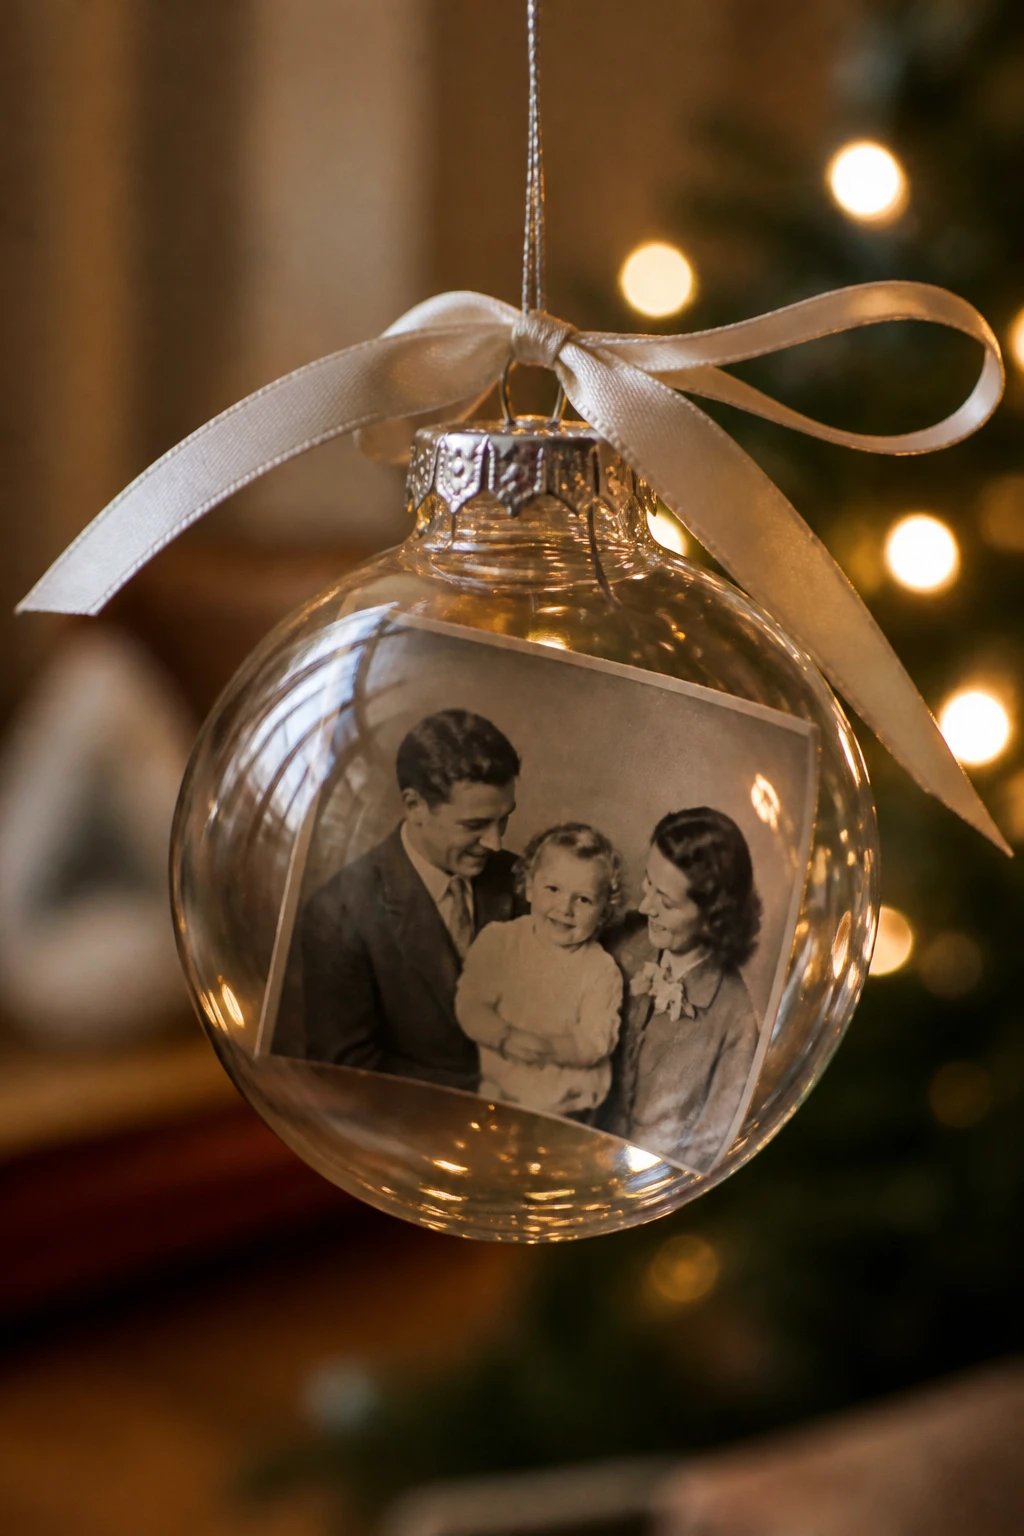
A small family photograph turns a simple bauble into a little time capsule. Choose a close-up with two or three faces so the memory stays clear at ornament size.
You will need: One 3-4 inch clear fillable ornament, a duplicate photo printed on flexible paper, scissors, a paper template, tweezers, and narrow ribbon.
Time to allow: About 20 minutes, plus ink drying.
- Check the opening first. A split-open plastic bauble is easiest; for a narrow-neck ornament, use a flexible print that can be gently rolled. Make a paper test piece that fits inside before trimming the photograph.
- Print a copy of your photo, let the ink dry, and trim it to your template. Write the names and year on the back. Keep the original photograph safely in its album.
- Slide the print inside and gently open it with tweezers, or set it into one half of a split bauble. Curve it lightly so it rests against the inside without needing liquid glue.
- Close the ornament, check that the cap or halves are secure, and tie on a ribbon loop. Hang it at eye level where the photograph can be enjoyed.
Keep in mind: Use copies, never irreplaceable photographs. Plastic baubles are a less fragile option.
Shop the Supplies: Vintage Photo Baubles
Browse similar supplies for this project. Check sizes and material compatibility before choosing.
2. Salt-Dough Stars, Hearts, and Handprints

These familiar shapes bring back the happy mess of a kitchen-table craft afternoon. Muted green, dusty pink, and ivory paint give salt-dough Christmas ornaments a gentle vintage feel.
You will need: 250 g plain all-purpose flour, 125 g table salt, 125 ml water, rolling pin, cutters, a straw, baking parchment, craft paint, suitable clear craft sealer, and ribbon.
Time to allow: About 25 minutes hands-on, plus drying and decorating.
- Mix the flour and salt, add the water, and bring together into a smooth dough. Roll on a lightly floured surface to an even thickness, about 5 mm for simple flat shapes.
- Cut stars, hearts, or trees. Make a hanging hole with a straw, leaving enough dough between the hole and the edge. For a handprint, press gently into a larger flat shape and check that the impression is visible.
- Place on a parchment-lined tray. Following Good Food’s base method, dry at 50°C (122°F), or your oven’s lowest setting, for about 3 hours or until solid. Thickness and ovens vary; larger impressions may take longer. Let an adult handle the oven and allow the pieces to cool fully.
- Paint the dry shapes, add the year, and let the paint dry. Apply a suitable craft sealer to the front, back, and edges according to its label. Let it dry fully before adding ribbon.
The dough quantities and low-temperature drying method come from Good Food’s salt-dough guide. Check for a solid, dry finish before decorating, rather than relying on the clock alone.
Keep in mind: Decorations only, not food. Keep dough and finished ornaments away from pets and young children who might mouth them. Store completely dry.
Shop the Supplies: Salt-Dough Stars, Hearts, and Handprints
Browse similar supplies for this project. Check sizes and material compatibility before choosing.
3. Mini Tin-Cup Tree Ornaments
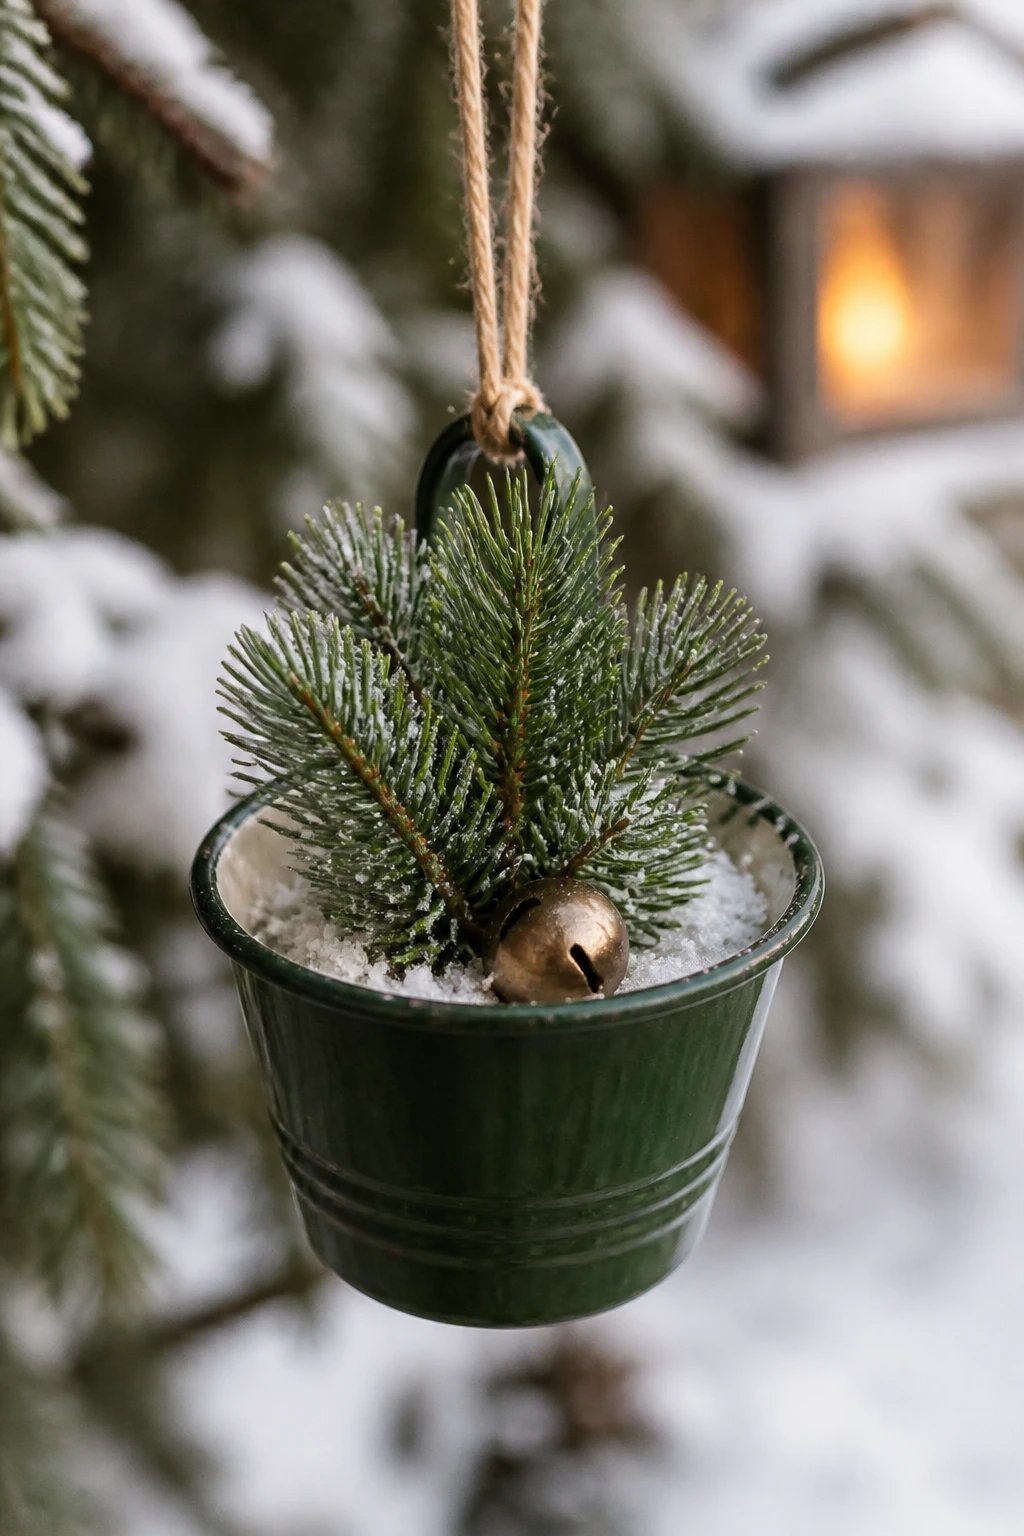
A tiny green pail, a miniature tree, and one little bell make a cheerful nod to old-fashioned Christmas villages. This version stays upright, just like the pictured ornament.
You will need: One lightweight miniature craft pail with an attached handle and smooth edges, a mini bottle-brush tree or faux evergreen sprig, a small cork or foam insert, craft adhesive compatible with your materials, a small bell, white felt, and twine.
Time to allow: About 20 minutes, plus adhesive curing.
- Choose a ready-painted pail, or paint a plain craft pail with paint labeled for metal and let it dry. Do not use cut food tins or containers with sharp edges.
- Trim a cork or foam insert to fit the base. Glue it inside using a compatible adhesive, then secure the miniature tree to the insert.
- Cover the insert with a little white felt for a snowy finish. Glue on one small bell, keeping the decoration light enough for the handle.
- Allow the adhesive to cure as directed. Tie twine to the handle, test the balance over a tabletop, and hang from a sturdy branch.
Keep in mind: Use ready-made smooth-edged craft containers. Small bells and loose parts are not toys.
Shop the Supplies: Mini Tin-Cup Tree Ornaments
Browse similar supplies for this project. Check sizes and material compatibility before choosing.
4. Vintage-Inspired Memento Baubles
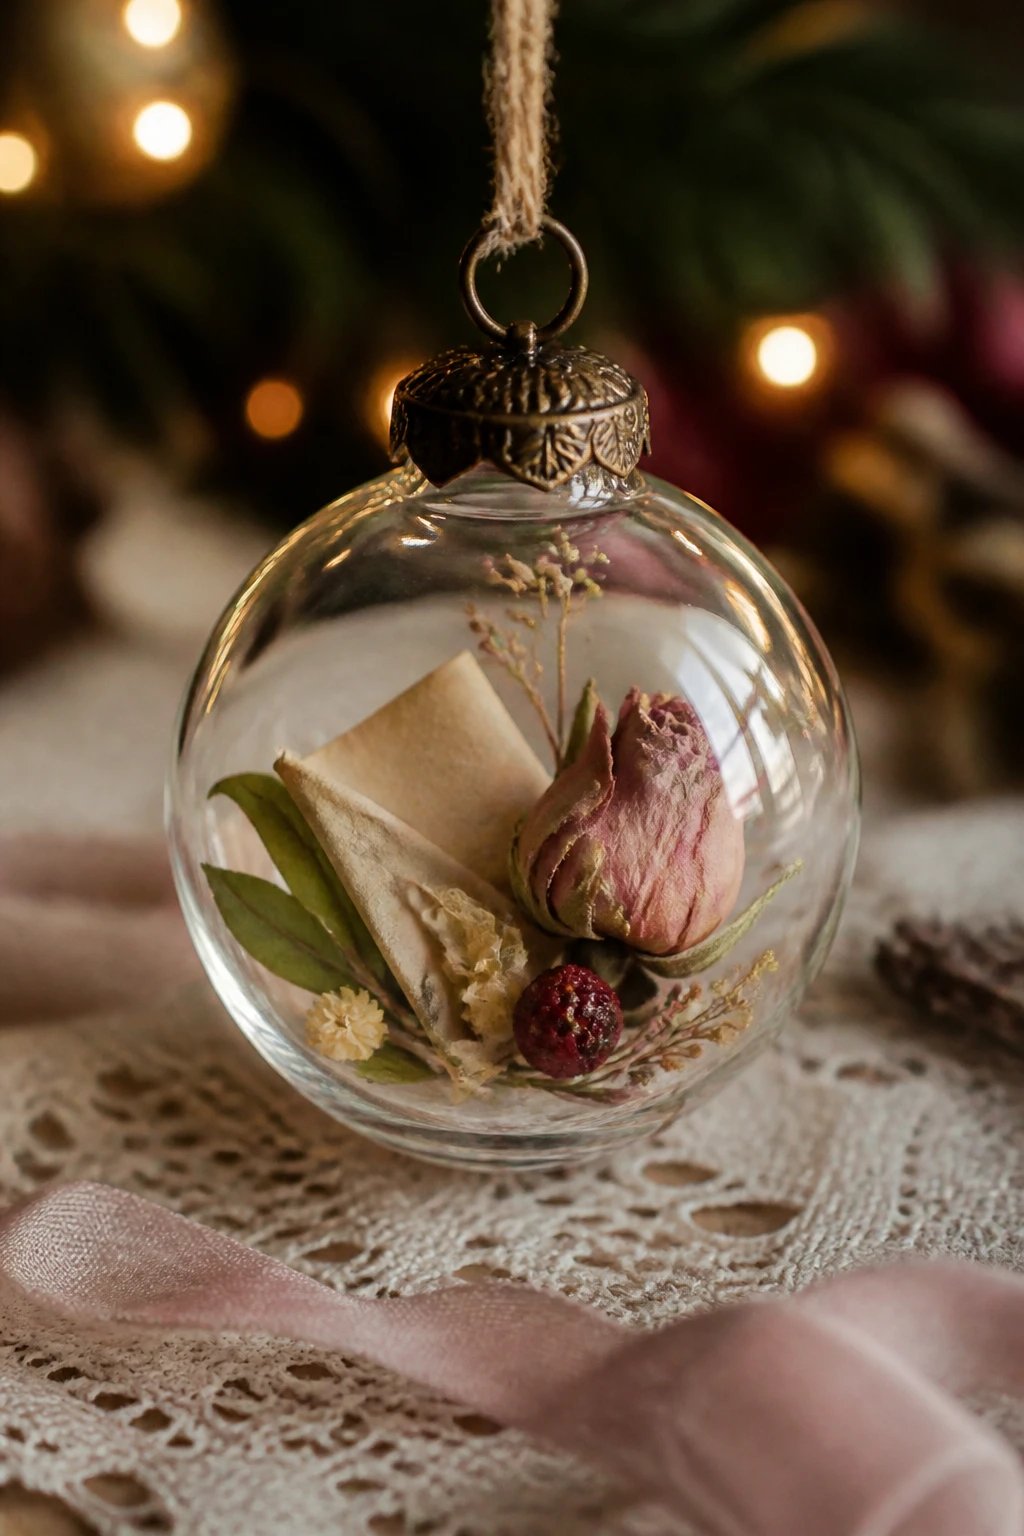
A copied letter, a pressed petal, or a scrap of lace can tell a story without filling the whole ornament. A quiet cream-and-blush palette lets each small detail stand out.
You will need: One split-open clear bauble, a copy of a short note, fully dried flowers, a small lace offcut, scissors, ribbon, and optional clear-drying craft glue compatible with the bauble.
Time to allow: About 20 minutes, plus optional glue drying.
- Choose two or three lightweight mementos. Copy handwriting or letters rather than cutting the originals, and make sure any botanical pieces are completely dry.
- Roll the copied note loosely and tie it with fine thread. Arrange it with a small flower and lace offcut in one half of the bauble.
- If the arrangement shifts, use a tiny amount of compatible craft glue on a hidden contact point. Allow it to dry with the ornament open; keep glue off the clear front.
- Close the bauble and add ribbon. Tie a small label to the hanger with the person’s name, occasion, or year.
Keep in mind: No resin is needed for this project. Use dry keepsakes and keep delicate originals elsewhere.
Shop the Supplies: Vintage-Inspired Memento Baubles
Browse similar supplies for this project. Check sizes and material compatibility before choosing.
5. Family Recipe Scroll Ornaments

A favorite handwritten recipe carries memories of the person who made it. These recipe scroll ornaments make thoughtful gifts, especially with a full-size recipe tucked into the gift bag.
You will need: One clear fillable bauble, a printed copy of a family recipe, scissors, fine thread, narrow ribbon, and an optional unscented white pom-pom small enough for the opening.
Time to allow: About 15 minutes, plus printing.
- Scan or photograph the recipe, then print a small copy on ordinary paper. Include its name and the cook’s name. Keep a full-size copy if the small writing will be difficult to read.
- Roll the paper around a pencil to form a narrow scroll, remove the pencil, and tie with fine thread. Check that it passes through the ornament opening.
- Add the optional pom-pom, then insert the scroll. Use a split-open bauble if either piece is too large for a narrow neck.
- Secure the cap and tie on ribbon. Add a gift tag naming the recipe, and include the readable full-size copy when gifting.
Keep in mind: Use a duplicate recipe. A small scroll is a keepsake; gift a separate full-size recipe for cooking.
Shop the Supplies: Family Recipe Scroll Ornaments
Browse similar supplies for this project. Check sizes and material compatibility before choosing.
6. Fabric and Button Keepsake Orbs

This soft, textured ornament is a lovely place for a few saved buttons or fabric scraps. The pictured ball is quite full; use a small, light base for a version that sits comfortably on a Christmas tree.
You will need: One 2-3 inch foam craft ball, fabric scraps, a short length of twine, buttons, lace or a small embroidered patch, scissors, and foam-safe craft adhesive.
Time to allow: About 30 minutes, plus adhesive curing.
- Tie the twine around the bare ball, cross it underneath, and tie securely at the top, leaving a hanging loop. This supports the ball instead of relying on a glued-on hanger.
- Cut fabric into small circles or patches. Use a little foam-safe adhesive to attach them, overlapping the edges and covering the twine around the ball while keeping the loop free.
- Add a few buttons, a lace strip, or one small embroidered patch. Arrange the heavier pieces evenly so the ornament does not pull to one side.
- Let the adhesive cure fully, then gently test the hanging loop over a soft surface. Add a small year label if you are giving it as a keepsake.
Keep in mind: Avoid straight pins for a family keepsake. This is a decoration, not a toy.
Shop the Supplies: Fabric and Button Keepsake Orbs
Browse similar supplies for this project. Check sizes and material compatibility before choosing.
7. Pressed-Flower Resin Keepsakes

A flat resin ornament gives a small copied photograph and pressed flowers a glass-like finish. This is the more involved, adults-only project in the collection, with timing determined by the resin you choose.
You will need: A shallow silicone ornament mold with a hanging-hole post, casting resin suitable for the mold depth, fully dried pressed flowers, a duplicate photo, compatible paper sealer, mixing cups and sticks, suitable protective gloves and eye protection, and ribbon.
Time to allow: About 30-45 minutes hands-on; curing depends on the product.
- Read the resin label and safety data sheet before starting. Prepare a level, protected workspace away from food, children, and pets, with the ventilation and protective equipment specified by the manufacturer.
- Test a duplicate print with your sealer and resin first. Seal absorbent paper on both sides and along the edges with a compatible product, then let it dry completely. Use fully dried flowers and arrange the design outside the mold.
- Measure and mix exactly as your resin directs; ratios may be by weight or volume and are not interchangeable. Pour a thin layer within the product’s depth limit, place the keepsakes, and add any further layer only within its stated recoat window.
- Cover against dust and leave undisturbed for the full cure time on the label. Demold only when fully cured, then thread ribbon through the molded hole. If the piece remains sticky, do not hang or gift it; consult the resin manufacturer’s troubleshooting advice.
For more on preparing printed keepsakes, see ArtResin’s paper-sealing guidance. Use your chosen resin’s instructions for the actual casting process.
Keep in mind: Adults only. Follow the product’s safety data sheet, mixing ratio, pour depth, and full cure time. A split-open memento bauble is the simpler no-resin alternative.
Shop the Supplies: Pressed-Flower Resin Keepsakes
Browse similar supplies for this project. Check sizes and material compatibility before choosing.
Printable Christmas Ornament Craft Cards
Keep these seven quick-reference cards beside your craft supplies. To print, open your browser’s Print menu (Ctrl+P on Windows or Command+P on Mac). The print layout shows the cards only. Check the preview and turn off browser headers and footers for a cleaner page.
1. Vintage Photo Baubles
Time: About 20 minutes, plus ink drying
Supplies: One 3-4 inch clear fillable ornament, a duplicate photo printed on flexible paper, scissors, a paper template, tweezers, and narrow ribbon.
- Check the opening first. A split-open plastic bauble is easiest; for a narrow-neck ornament, use a flexible print that can be gently rolled. Make a paper test piece that fits inside before trimming the photograph.
- Print a copy of your photo, let the ink dry, and trim it to your template. Write the names and year on the back. Keep the original photograph safely in its album.
- Slide the print inside and gently open it with tweezers, or set it into one half of a split bauble. Curve it lightly so it rests against the inside without needing liquid glue.
- Close the ornament, check that the cap or halves are secure, and tie on a ribbon loop. Hang it at eye level where the photograph can be enjoyed.
Helpful tip: Print two sizes on ordinary paper first. A slightly smaller photograph often looks clearer through curved plastic or glass.
Remember: Use copies, never irreplaceable photographs. Plastic baubles are a less fragile option.
HypeVine • Nostalgic DIY Christmas Ornaments
2. Salt-Dough Stars, Hearts, and Handprints
Time: About 25 minutes hands-on, plus drying and decorating
Supplies: 250 g plain all-purpose flour, 125 g table salt, 125 ml water, rolling pin, cutters, a straw, baking parchment, craft paint, suitable clear craft sealer, and ribbon.
- Mix the flour and salt, add the water, and bring together into a smooth dough. Roll on a lightly floured surface to an even thickness, about 5 mm for simple flat shapes.
- Cut stars, hearts, or trees. Make a hanging hole with a straw, leaving enough dough between the hole and the edge. For a handprint, press gently into a larger flat shape and check that the impression is visible.
- Place on a parchment-lined tray. Following Good Food's base method, dry at 50°C (122°F), or your oven's lowest setting, for about 3 hours or until solid. Thickness and ovens vary; larger impressions may take longer. Let an adult handle the oven and allow the pieces to cool fully.
- Paint the dry shapes, add the year, and let the paint dry. Apply a suitable craft sealer to the front, back, and edges according to its label. Let it dry fully before adding ribbon.
Helpful tip: Leave a generous border around handprints and hanging holes. Thin edges are the first places likely to snap.
Remember: Decorations only, not food. Keep dough and finished ornaments away from pets and young children who might mouth them. Store completely dry.
HypeVine • Nostalgic DIY Christmas Ornaments
3. Mini Tin-Cup Tree Ornaments
Time: About 20 minutes, plus adhesive curing
Supplies: One lightweight miniature craft pail with an attached handle and smooth edges, a mini bottle-brush tree or faux evergreen sprig, a small cork or foam insert, craft adhesive compatible with your materials, a small bell, white felt, and twine.
- Choose a ready-painted pail, or paint a plain craft pail with paint labeled for metal and let it dry. Do not use cut food tins or containers with sharp edges.
- Trim a cork or foam insert to fit the base. Glue it inside using a compatible adhesive, then secure the miniature tree to the insert.
- Cover the insert with a little white felt for a snowy finish. Glue on one small bell, keeping the decoration light enough for the handle.
- Allow the adhesive to cure as directed. Tie twine to the handle, test the balance over a tabletop, and hang from a sturdy branch.
Helpful tip: Test the pail's balance before the glue sets. Positioning the tree in the center helps the ornament hang straight.
Remember: Use ready-made smooth-edged craft containers. Small bells and loose parts are not toys.
HypeVine • Nostalgic DIY Christmas Ornaments
4. Vintage-Inspired Memento Baubles
Time: About 20 minutes, plus optional glue drying
Supplies: One split-open clear bauble, a copy of a short note, fully dried flowers, a small lace offcut, scissors, ribbon, and optional clear-drying craft glue compatible with the bauble.
- Choose two or three lightweight mementos. Copy handwriting or letters rather than cutting the originals, and make sure any botanical pieces are completely dry.
- Roll the copied note loosely and tie it with fine thread. Arrange it with a small flower and lace offcut in one half of the bauble.
- If the arrangement shifts, use a tiny amount of compatible craft glue on a hidden contact point. Allow it to dry with the ornament open; keep glue off the clear front.
- Close the bauble and add ribbon. Tie a small label to the hanger with the person's name, occasion, or year.
Helpful tip: Leave some empty space. One meaningful note and a flower are often prettier than a tightly packed ornament.
Remember: No resin is needed for this project. Use dry keepsakes and keep delicate originals elsewhere.
HypeVine • Nostalgic DIY Christmas Ornaments
5. Family Recipe Scroll Ornaments
Time: About 15 minutes, plus printing
Supplies: One clear fillable bauble, a printed copy of a family recipe, scissors, fine thread, narrow ribbon, and an optional unscented white pom-pom small enough for the opening.
- Scan or photograph the recipe, then print a small copy on ordinary paper. Include its name and the cook's name. Keep a full-size copy if the small writing will be difficult to read.
- Roll the paper around a pencil to form a narrow scroll, remove the pencil, and tie with fine thread. Check that it passes through the ornament opening.
- Add the optional pom-pom, then insert the scroll. Use a split-open bauble if either piece is too large for a narrow neck.
- Secure the cap and tie on ribbon. Add a gift tag naming the recipe, and include the readable full-size copy when gifting.
Helpful tip: Keep the ornament unscented. You can bring the holiday feeling with ribbon and warm colors without adding oils that might mark the paper.
Remember: Use a duplicate recipe. A small scroll is a keepsake; gift a separate full-size recipe for cooking.
HypeVine • Nostalgic DIY Christmas Ornaments
6. Fabric and Button Keepsake Orbs
Time: About 30 minutes, plus adhesive curing
Supplies: One 2-3 inch foam craft ball, fabric scraps, a short length of twine, buttons, lace or a small embroidered patch, scissors, and foam-safe craft adhesive.
- Tie the twine around the bare ball, cross it underneath, and tie securely at the top, leaving a hanging loop. This supports the ball instead of relying on a glued-on hanger.
- Cut fabric into small circles or patches. Use a little foam-safe adhesive to attach them, overlapping the edges and covering the twine around the ball while keeping the loop free.
- Add a few buttons, a lace strip, or one small embroidered patch. Arrange the heavier pieces evenly so the ornament does not pull to one side.
- Let the adhesive cure fully, then gently test the hanging loop over a soft surface. Add a small year label if you are giving it as a keepsake.
Helpful tip: Choose two fabric colors and repeat them. A mix of cream and sage looks collected while allowing the buttons to shine.
Remember: Avoid straight pins for a family keepsake. This is a decoration, not a toy.
HypeVine • Nostalgic DIY Christmas Ornaments
7. Pressed-Flower Resin Keepsakes
Time: About 30-45 minutes hands-on; curing depends on the product
Supplies: A shallow silicone ornament mold with a hanging-hole post, casting resin suitable for the mold depth, fully dried pressed flowers, a duplicate photo, compatible paper sealer, mixing cups and sticks, suitable protective gloves and eye protection, and ribbon.
- Read the resin label and safety data sheet before starting. Prepare a level, protected workspace away from food, children, and pets, with the ventilation and protective equipment specified by the manufacturer.
- Test a duplicate print with your sealer and resin first. Seal absorbent paper on both sides and along the edges with a compatible product, then let it dry completely. Use fully dried flowers and arrange the design outside the mold.
- Measure and mix exactly as your resin directs; ratios may be by weight or volume and are not interchangeable. Pour a thin layer within the product's depth limit, place the keepsakes, and add any further layer only within its stated recoat window.
- Cover against dust and leave undisturbed for the full cure time on the label. Demold only when fully cured, then thread ribbon through the molded hole. If the piece remains sticky, do not hang or gift it; consult the resin manufacturer's troubleshooting advice.
Helpful tip: For a first attempt, use spare petals and a practice photo. Keep the arrangement simple, and use the resin label rather than a universal curing time.
Remember: Adults only. Follow the product's safety data sheet, mixing ratio, pour depth, and full cure time. A split-open memento bauble is the simpler no-resin alternative.
HypeVine • Nostalgic DIY Christmas Ornaments
DIY Christmas Ornaments FAQs
Which DIY Christmas ornaments are easiest for beginners?
The photo bauble, memento bauble, and recipe scroll need little more than cutting, arranging, and tying ribbon. Choose a split-open plastic ornament if a narrow opening makes assembly fiddly.
Can I use original family photos or handwritten recipes?
Use scans, photocopies, or duplicate prints. Glue, resin, fading, and accidental damage can permanently change paper, so keep the original safely stored.
How do I stop salt-dough ornaments getting soft?
Dry them fully before painting, seal the front, back, and edges, and let the finish dry before packing. Keep them indoors in a dry place. Sealing helps, but it does not make salt dough waterproof.
Are these Christmas ornaments suitable for children to make?
With supervision, children can help choose photos, arrange paper keepsakes, or paint cooled salt-dough shapes using age-appropriate supplies. Adults should handle the oven, sharp tools, and resin. Keep small parts away from children who may put them in their mouths.
How should I store handmade keepsake ornaments?
Check that every piece is dry, wrap ornaments individually in acid-free tissue, and separate them in a sturdy box. Keep the box somewhere cool and dry, away from direct sunlight and damp storage areas. Label each compartment with the project and year.
Make a Little Memory for Your Tree
You do not need a whole matching collection to make the tree feel personal. Choose one photograph, one recipe, or a handful of buttons and make an ornament that tells a small story. A little uneven stitching or a hand-painted date is part of its charm.
Save this for your next craft afternoon, and don’t forget to print your craft cards before you begin.
For another relaxed holiday project, explore our easy paper Christmas decorations or mason jar crafts for every season.
Make Something Worth Keeping
Find more easy projects, thoughtful handmade gifts, and little creative moments for your home.
Explore More DIY & Crafts