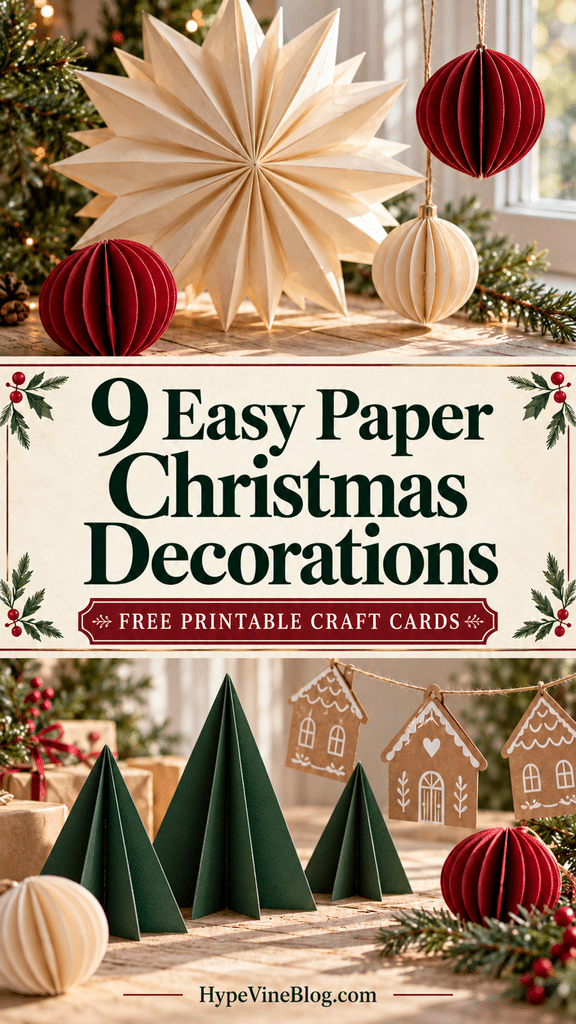
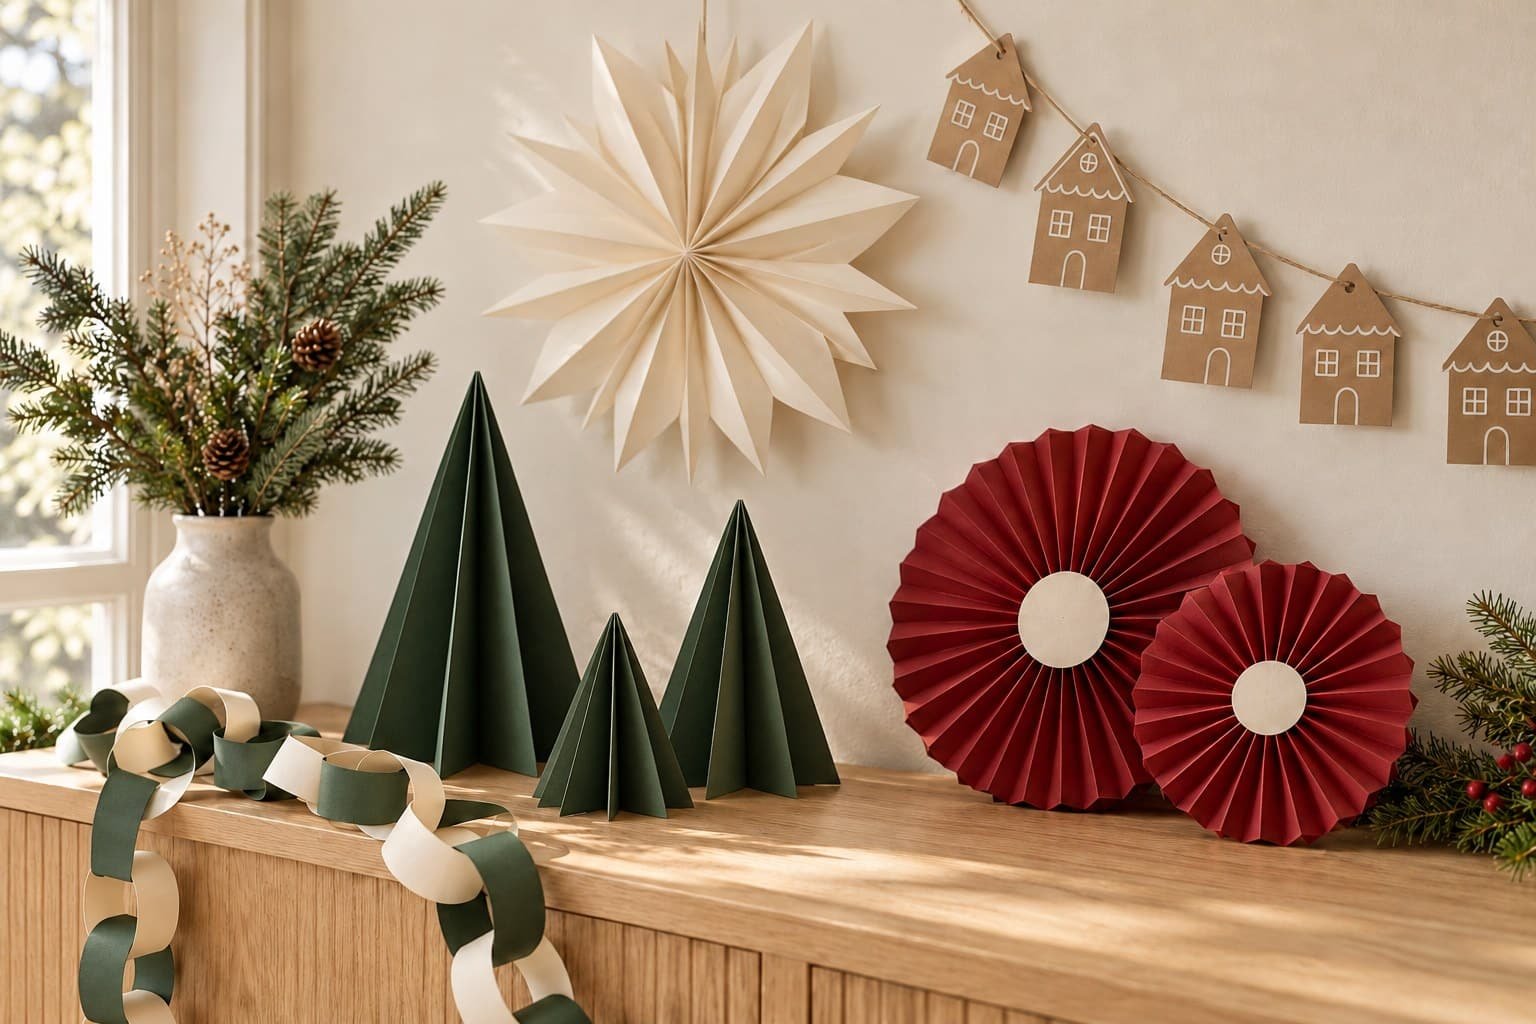
A few sheets of paper can become a star above your sideboard, a tiny forest on a shelf, or a sweet village strung across a doorway. We love that easy paper Christmas decorations give you room to play with color without needing a cupboard full of supplies.
These Christmas paper crafts include ornaments, garlands, and tabletop decorations, with measurements, supply lists, numbered steps, and tips for the little things that can go wrong. Choose one for a quiet afternoon or set out a few options for a relaxed craft night.
Table of Contents
This post contains affiliate links. As an Amazon Associate, HypeVine earns from qualifying purchases, at no extra cost to you. Thank you for supporting our creative corner.
✦ ✦ ✦
Choose your first paper Christmas craft
- For a quick first project: start with the paper-chain garland or accordion-fan tree ornaments.
- For a bigger decorating moment: try a paper-bag star or paper-leaf wreath.
- For a tabletop: choose the standing folded trees or simple cone trees.
- For a thoughtful gift topper: make a rosette or folded-circle bauble.
- For a little storytelling: make the gingerbread-house garland and give each house its own windows and door.
Before you begin: Make one sample before cutting a whole batch. All times below are estimates and exclude glue drying. Use a protected, dry work surface, supervise children with scissors and small parts, and keep paper and hanging strings away from flame, heat, and curious pets.
Your master shopping list
You do not need to buy everything. Check your gift-wrap scraps, clean cereal boxes, ribbon drawer, and basic stationery first. These quantities allow for one of each project with some spare paper.
- 10 matching gusseted paper lunch bags.
- About 10 sheets of lightweight or medium-weight craft paper, 80-160 gsm. For the rosette, include two 12-inch lengths or join shorter strips.
- About 8 sheets of light cardstock, 160-180 gsm, including at least two kraft sheets.
- One clean 7 x 7 inch piece of thin cardboard.
- At least 3 yards of cotton string and 10 inches of ribbon.
- A strong glue stick, small bottle of tacky glue, double-sided craft tape, and clear tape.
- Scissors, ruler, pencil, small clips, and a hole punch.
- Optional: a white paint pen or white colored pencil and a blunt folding tool.
Paper tip: GSM describes paper weight. Lightweight paper folds more easily; cardstock supports standing shapes. Check the listing rather than relying on the word “craft” or “scrapbook.” If printing directly on card, check your printer’s supported paper weight first.
MAKE A LITTLE HOLIDAY MAGIC
Shop the Supplies: Craft-Cupboard Basics
Check your supplies before buying. Choose 80-120 gsm paper for folding, 120-160 gsm for baubles, and 160-180 gsm cardstock for standing trees. Reuse clean cardboard and paper scraps where you can.
Browse supply options on Amazon. Check sizes, paper weights, and adhesive labels before choosing.
Printable craft cards and templates
The 13-page printable pack has a combined shopping checklist, one full-page card for each project, and three actual-size template sheets. Print only the project card and template pages you need.
Printing guide: Page 1 is the shopping checklist; pages 2-10 are the nine project cards. Page 11 has the tree, bauble, and house templates; page 12 has the wreath and leaf; page 13 has the cone template. Print template pages at 100% or Actual Size, not Fit, and measure the 1-inch test square before cutting.
✦ ✦ ✦
1. Paper-Bag Stars
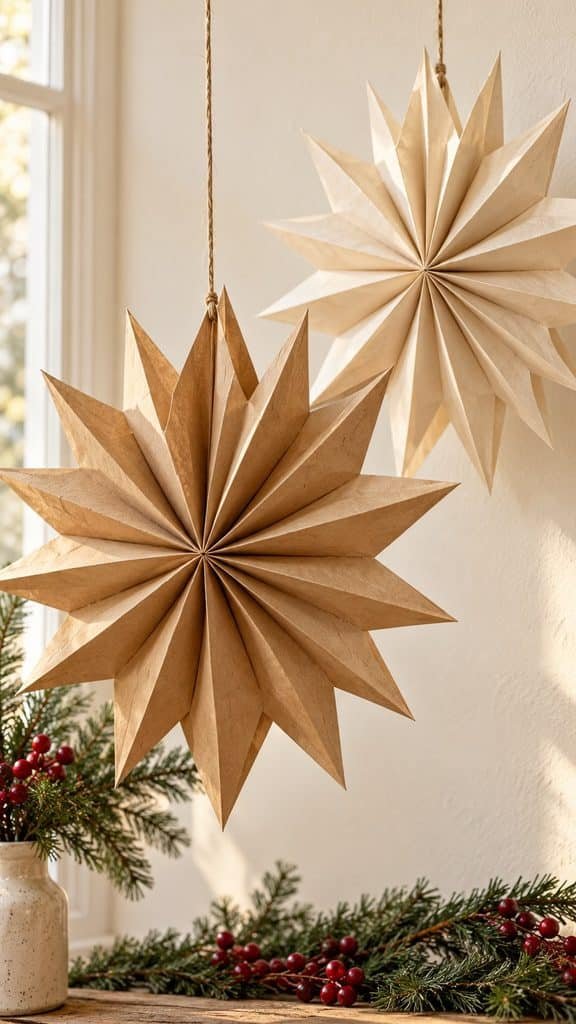
A pair of cream stars looks lovely over a sideboard. Keep paper away from fireplaces, heaters, and candles.
Makes: 1 large star
Estimated time: 20-30 minutes, plus drying
What you need
- 7-10 plain paper lunch bags, all the same size
- Strong glue stick or a thin layer of tacky glue
- Scissors, pencil, 12 inches of cotton string
- Clear tape and 2 small paper clips
Step-by-step instructions
- Lay a bag flat with its opening at the top and its folded bottom flap facing down. Apply glue in an upside-down T: across the closed bottom edge and up the vertical center. Keep the gusseted sides free of glue.
- Stack another bag on top in exactly the same orientation and press. Repeat until seven bags are stacked. Keep extra bags nearby; the number needed depends on the width and depth of your bags.
- Draw a point at the open end, starting the diagonal cuts about 2 inches below the top corners. Cut through only as many layers as your scissors handle easily. Use the first cut bag as a guide if cutting in smaller stacks.
- Let the adhesive set according to its label. Gently fan the stack open until the first and last bags meet. If they do not meet comfortably, close it and add one bag at a time with the same glue pattern. Never stretch the paper to force it shut.
- Clip the first and last faces together for a star that can fold flat, or glue them for a permanent finish. Reinforce a hanging point with clear tape, make a small hole, and thread the string through.
- Hang indoors from a suitable hook. For storage, remove the clips and close the star like a book.
Helpful tip: Start with plain pointed tips. Side cutouts are optional and can weaken a first attempt. Leave the central glued spine intact.
Troubleshooting: If the star will not open, check for glue along the side gussets. A tear at the hanging hole usually means the hole needs tape reinforcement.
MAKE A LITTLE HOLIDAY MAGIC
Shop the Supplies: Paper-Bag Stars
Choose matching gusseted bags and either a strong paper glue stick or tacky glue. Two small clips and a little clear tape help finish the hanging point.
Browse supply options on Amazon. Check sizes, paper weights, and adhesive labels before choosing.
✦ ✦ ✦
2. Accordion-Fan Tree Ornaments
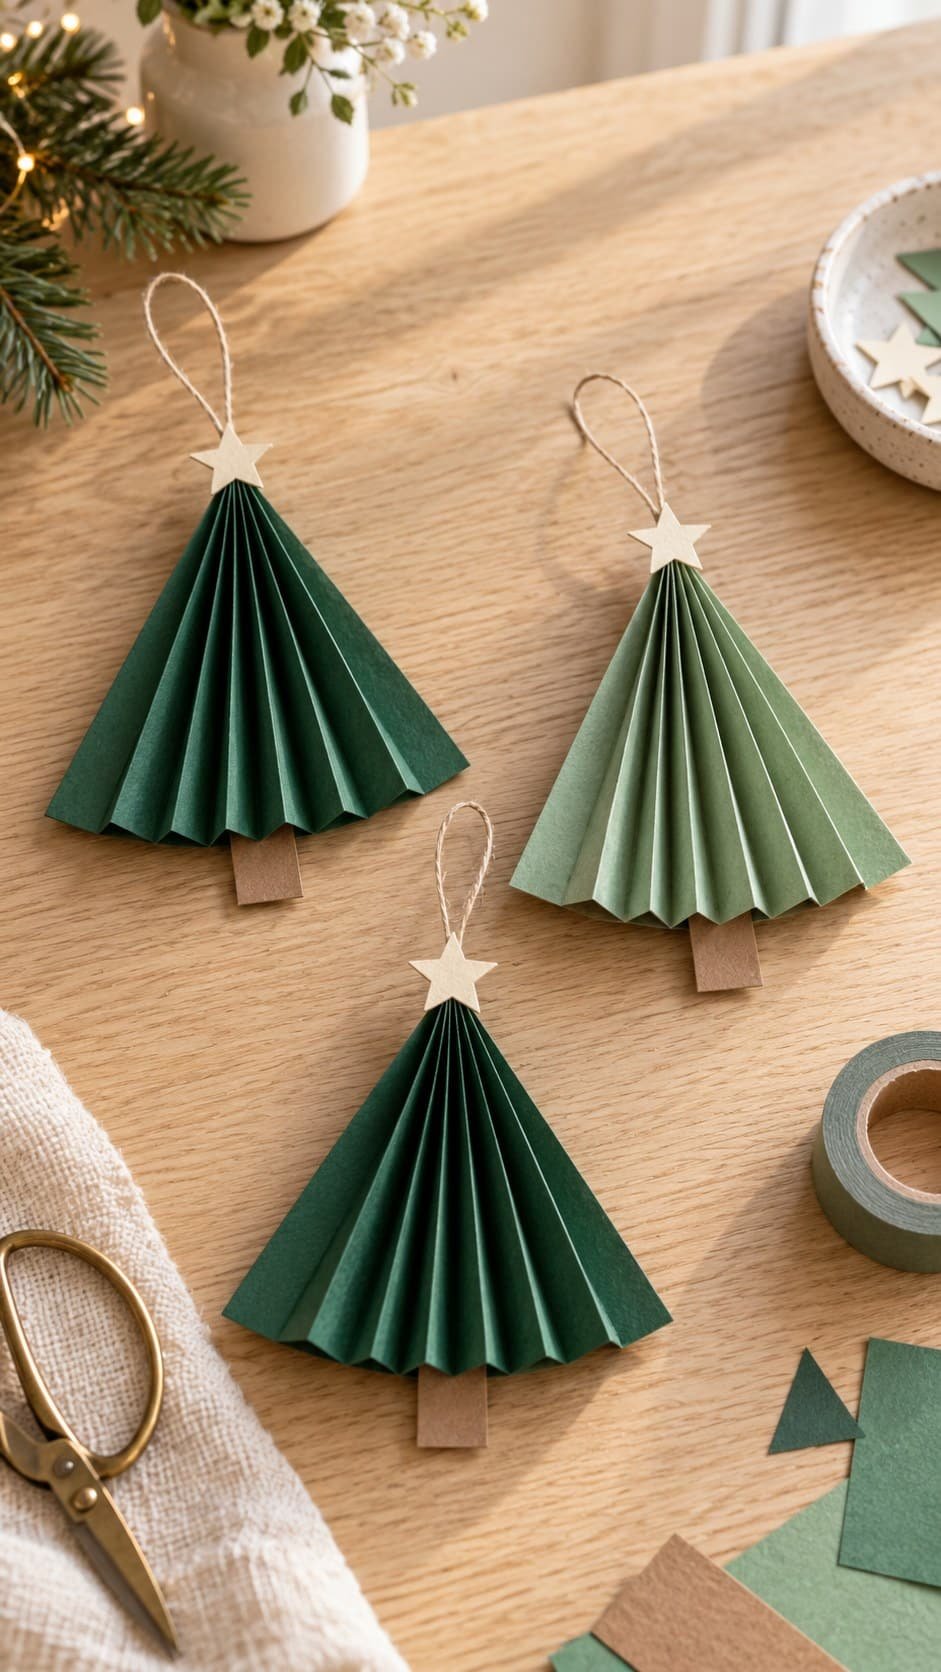
Mix two shades of green and repeat the same cream star topper for a coordinated tree.
Makes: 1 flat tree ornament, about 5 inches tall
Estimated time: 10-15 minutes each, plus drying
What you need
- One 6 x 4 inch rectangle of 80-120 gsm green paper
- One 1/2 x 2 inch strip of brown cardstock
- Glue stick, narrow craft tape, scissors, ruler
- One 8 inch string loop; optional small paper star
Step-by-step instructions
- Place the rectangle with the 6 inch edge horizontal and the 4 inch edge vertical. Mark every 1/2 inch across the 6 inch edge.
- Make alternating forward and backward folds at the marks, keeping every crease parallel to the 4 inch sides. Your compressed accordion should be about 1/2 inch wide and 4 inches tall.
- Pinch the top 1/2 inch of the accordion together and wrap that pinched end with a narrow strip of craft tape. Spread the opposite end into a fan. The pinched end becomes the tree tip.
- Glue the brown strip vertically behind the center so about 1 inch extends below the fan as a trunk. Let the join dry before lifting.
- Tape the knotted ends of an 8 inch hanging loop behind the pinched tip. Cover the join with a small paper star if you like.
- Adjust the bottom folds so the tree opens evenly, then hang it on a branch or attach it to a gift.
Helpful tip: Use lightweight paper for this project. Thick cardstock makes the pinched tip bulky and harder to secure.
Troubleshooting: If the fan springs closed, reinforce the pinched tip and gently widen the lower folds. Keep this ornament flat; it is not a freestanding tree.
MAKE A LITTLE HOLIDAY MAGIC
Shop the Supplies: Accordion-Fan Tree Ornaments
Look for 80-120 gsm green paper and a scrap of brown cardstock for the trunk. Cut the optional star from leftover paper.
Browse supply options on Amazon. Check sizes, paper weights, and adhesive labels before choosing.
✦ ✦ ✦
3. Pleated Paper Rosettes

Cranberry rosettes with cream centers make cheerful tree decorations and gift toppers.
Makes: 1 rosette, about 4 inches across
Estimated time: 20-25 minutes each, plus drying
What you need
- Two 2 x 12 inch paper strips, 80-120 gsm
- Two 1 1/2 inch cardstock circles
- Double-sided craft tape, tacky glue, ruler, scissors
- One 8 inch hanging loop and small clips
Step-by-step instructions
- Mark each 12 inch strip at 1/2 inch intervals. Accordion-fold each strip at the marks, with creases parallel to the short 2 inch ends.
- Overlap one end panel from each strip and tape them together, continuing the zigzag pattern. Join the remaining ends the same way to make a pleated ring.
- Stand the ring on a protected table. Gently draw one rim toward the center while pushing the other rim outward and down, forming a flat pleated circle. Keep hold of the center; it will want to spring up.
- Spread a thin layer of tacky glue on one cardstock circle. Place it over the center and hold the pleats flat until the bond can support them. Follow the glue label for drying time.
- Once secure, turn the rosette over. Glue the string ends beneath the second cardstock circle and press that circle over the back center. Support the piece while it dries fully.
- Use the front circle as a simple label or cover it with a contrasting paper circle. Hang only after both joins are dry.
Helpful tip: Cut strips from 12 x 12 inch craft paper. If you only have Letter or A4 sheets, join shorter pieces to make two 12 inch strips before folding.
Troubleshooting: A popping center needs more setting time or a stronger paper-craft adhesive. Avoid soaking the thin paper with glue.
MAKE A LITTLE HOLIDAY MAGIC
Shop the Supplies: Pleated Paper Rosettes
Choose 80-120 gsm paper with a 12-inch length, or join shorter strips. Cardstock scraps work well for the center circles.
Browse supply options on Amazon. Check sizes, paper weights, and adhesive labels before choosing.
✦ ✦ ✦
4. Classic Paper-Chain Garland
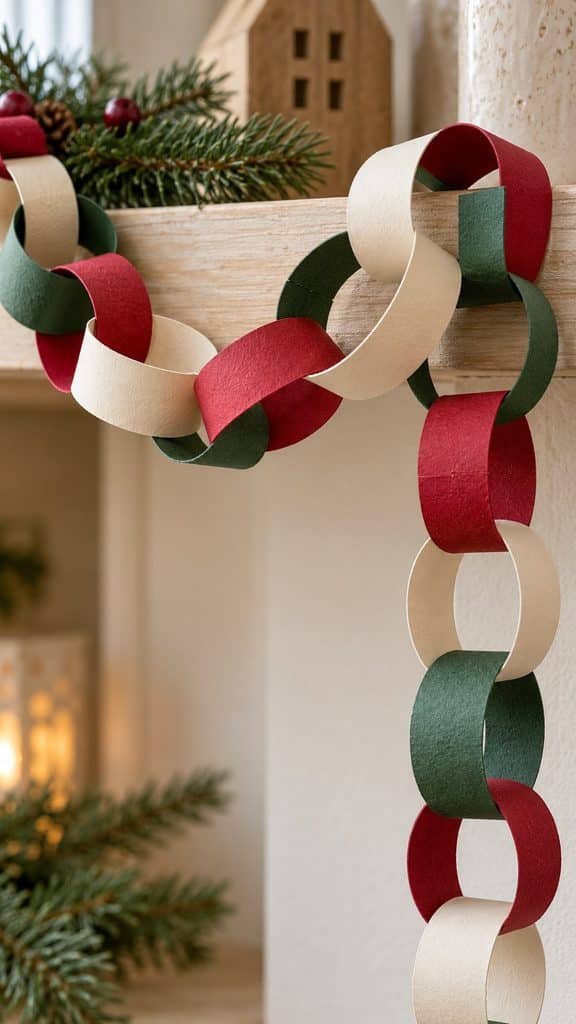
A cream, green, cranberry repeat brings a familiar, nostalgic touch to an indoor doorway.
Makes: A chain of 24 links; finished length varies
Estimated time: 20-30 minutes
What you need
- Three sheets of colored paper, at least 8 x 10 inches each
- Scissors, ruler, pencil
- Glue stick or double-sided craft tape
Step-by-step instructions
- Measure and cut twenty-four strips, each 1 inch wide and 6 inches long. A 6 x 8 inch portion of each sheet gives eight strips.
- Arrange the strips in a repeating color sequence before joining them. This makes it easier to keep the pattern consistent.
- Curve the first strip into a ring, overlap its ends by about 1/2 inch, and glue or tape the overlap. Press firmly.
- Pass the second strip through the first ring. Form another ring and secure the ends with the same overlap.
- Repeat until all 24 strips are linked. Let glued joints set flat before hanging.
- Drape the finished chain loosely over a dry shelf or attach it to suitable hooks. Add extra links if you need a longer garland; do not pull the existing links tight.
Helpful tip: Use colored printer paper or gift-wrap offcuts with enough body to hold a ring. Very thin tissue tears easily.
Troubleshooting: If links keep opening, increase the overlap slightly and switch to double-sided craft tape, especially on glossy paper.
MAKE A LITTLE HOLIDAY MAGIC
Shop the Supplies: Paper-Chain Garland
Choose three coordinating paper colors. You only need one adhesive, a glue stick or thin double-sided craft tape.
Browse supply options on Amazon. Check sizes, paper weights, and adhesive labels before choosing.
✦ ✦ ✦
5. Folded-Circle Paper Baubles

Try alternating cream and cranberry fins for a soft striped effect.
Makes: 1 bauble, about 3 inches across
Estimated time: 20-25 minutes each, plus drying
What you need
- Six 3 inch paper circles, roughly 120-160 gsm
- Circle template from this pack, scissors, glue stick
- One 10 inch length of cotton string
- Small paper clips
Step-by-step instructions
- Trace the 3 inch circle template six times and cut out the circles. Use two or three coordinating colors, or double-sided patterned paper.
- Fold every circle exactly in half. For single-sided patterned paper, fold with the pattern inside; the plain outer halves will be glued together.
- Apply glue to one outer half of the first folded circle and press it against one outer half of the second. Align the curved edges and center folds.
- Continue joining outer half-faces until all six folded circles form a stack. Leave the first and last outer faces unglued for now.
- Fold the string in half and knot its ends. Lay the knotted end along the central spine, leaving a loop above the bauble, and secure with a little glue.
- Glue the final two outer faces together around the string. Open the six paper fins evenly, clip joins as needed, and let the bauble dry before hanging.
Helpful tip: Accurate circles matter more than fancy paper. Cut one test circle, then use it to check the rest.
Troubleshooting: If the fins sit unevenly, realign the glued edges while the adhesive is still workable. Heavy card can leave a bulky spine.
MAKE A LITTLE HOLIDAY MAGIC
Shop the Supplies: Folded-Circle Paper Baubles
Choose paper around 120-160 gsm. Use the free circle template above; small clips hold the glued layers while they set.
Browse supply options on Amazon. Check sizes, paper weights, and adhesive labels before choosing.
✦ ✦ ✦
6. Standing Folded Paper Trees

Make a small grove in green and cream. Display on a dry mantel with flameless candles placed separately.
Makes: 1 freestanding tree, 6 inches tall
Estimated time: 25-35 minutes each, plus drying
What you need
- Three Letter or A4 sheets of 160-180 gsm cardstock
- The 3 1/2 x 6 inch tree triangle template
- Glue stick, ruler, scissors, small paper clips
Step-by-step instructions
- Trace and cut six triangles using the template. Each triangle is 3 1/2 inches wide at the base and 6 inches tall. Keep all six base edges straight.
- Score a light line from each tip to the center of its base with a blunt folding tool or the back of a spoon. Fold every triangle in half along this line.
- Glue one outer half-face to an outer half-face of the next folded triangle. Match the tips and base edges carefully.
- Repeat with all six pieces, keeping the center folds together. Glue the first and last outer half-faces together to close the shape into a six-fin tree.
- Spread the fins evenly around the center. Stand the tree on a flat table and check that all bottom edges touch it before the glue fully sets.
- Let it dry standing upright. If necessary, trim a tiny amount from an uneven base edge after drying.
Helpful tip: Use the template at actual size and keep the bottom edges level. This simple triangular silhouette avoids fiddly branch cuts.
Troubleshooting: If the tree tips, spread its fins evenly and check the base. Softer paper may sag; light cardstock gives better support.
MAKE A LITTLE HOLIDAY MAGIC
Shop the Supplies: Standing Folded Paper Trees
Choose 160-180 gsm cardstock and use the free triangle template above. A glue stick keeps the flat faces tidy; clips help them dry evenly.
Browse supply options on Amazon. Check sizes, paper weights, and adhesive labels before choosing.
✦ ✦ ✦
7. Simple Paper-Cone Trees
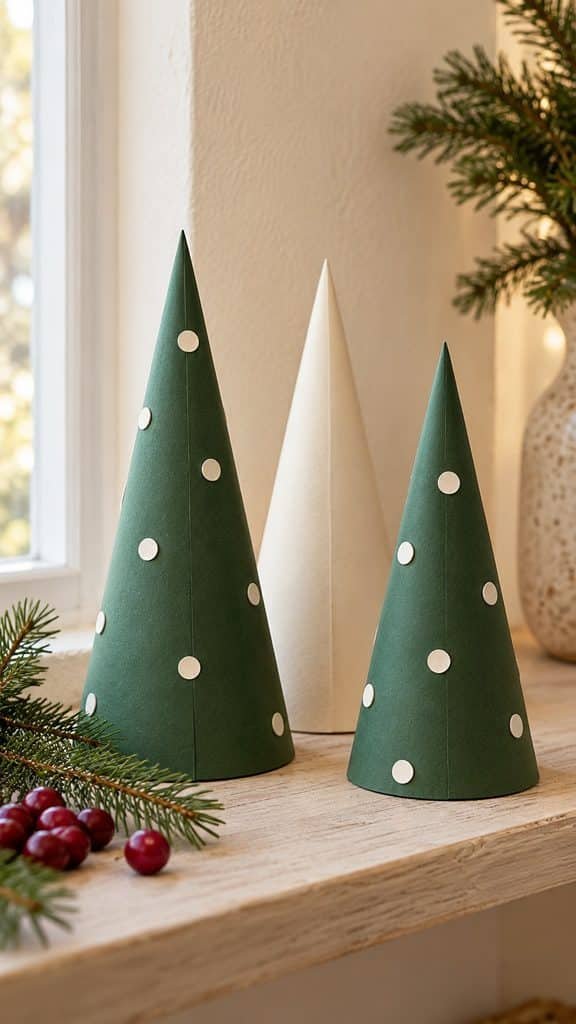
White dots on forest-green cones create a simple snowy look without loose glitter.
Makes: 1 cone tree, about 5 3/4 inches tall
Estimated time: 15-20 minutes each
What you need
- One sheet of 160-180 gsm cardstock
- Quarter-circle template from this pack
- Double-sided craft tape, scissors
- Optional paper dots or strips cut from scraps
Step-by-step instructions
- Print the quarter-circle template at actual size. Cut it out and trace it onto cardstock, or use it directly if your printer supports the cardstock.
- Cut along the two straight edges and curved edge. The two straight edges are each 6 inches long.
- Gently curve the paper with your hands. Bring the two straight edges together, overlapping them by about 1/4 inch to form a cone.
- Tape the overlap from the inside, then press the seam firmly. The quarter-circle’s corner becomes the top of the tree.
- Stand the cone on the table. If it rocks, adjust the overlap before firmly securing it, or trim a small amount from the lower edge.
- Decorate with small paper dots or short paper strips. Keep embellishments lightweight so the tree remains balanced.
Helpful tip: Curl the cardstock gently before taping. A gradual curve gives a cleaner cone than a sharply creased seam.
Troubleshooting: If the seam opens, use fresh craft tape on clean, dry paper and reinforce from the inside.
MAKE A LITTLE HOLIDAY MAGIC
Shop the Supplies: Paper-Cone Trees
Choose 160-180 gsm cardstock and use the free quarter-circle template above. Decorate with dots or strips cut from scraps, attaching them with small pieces of craft tape.
Browse supply options on Amazon. Check sizes, paper weights, and adhesive labels before choosing.
✦ ✦ ✦
8. Layered Paper-Leaf Wreath
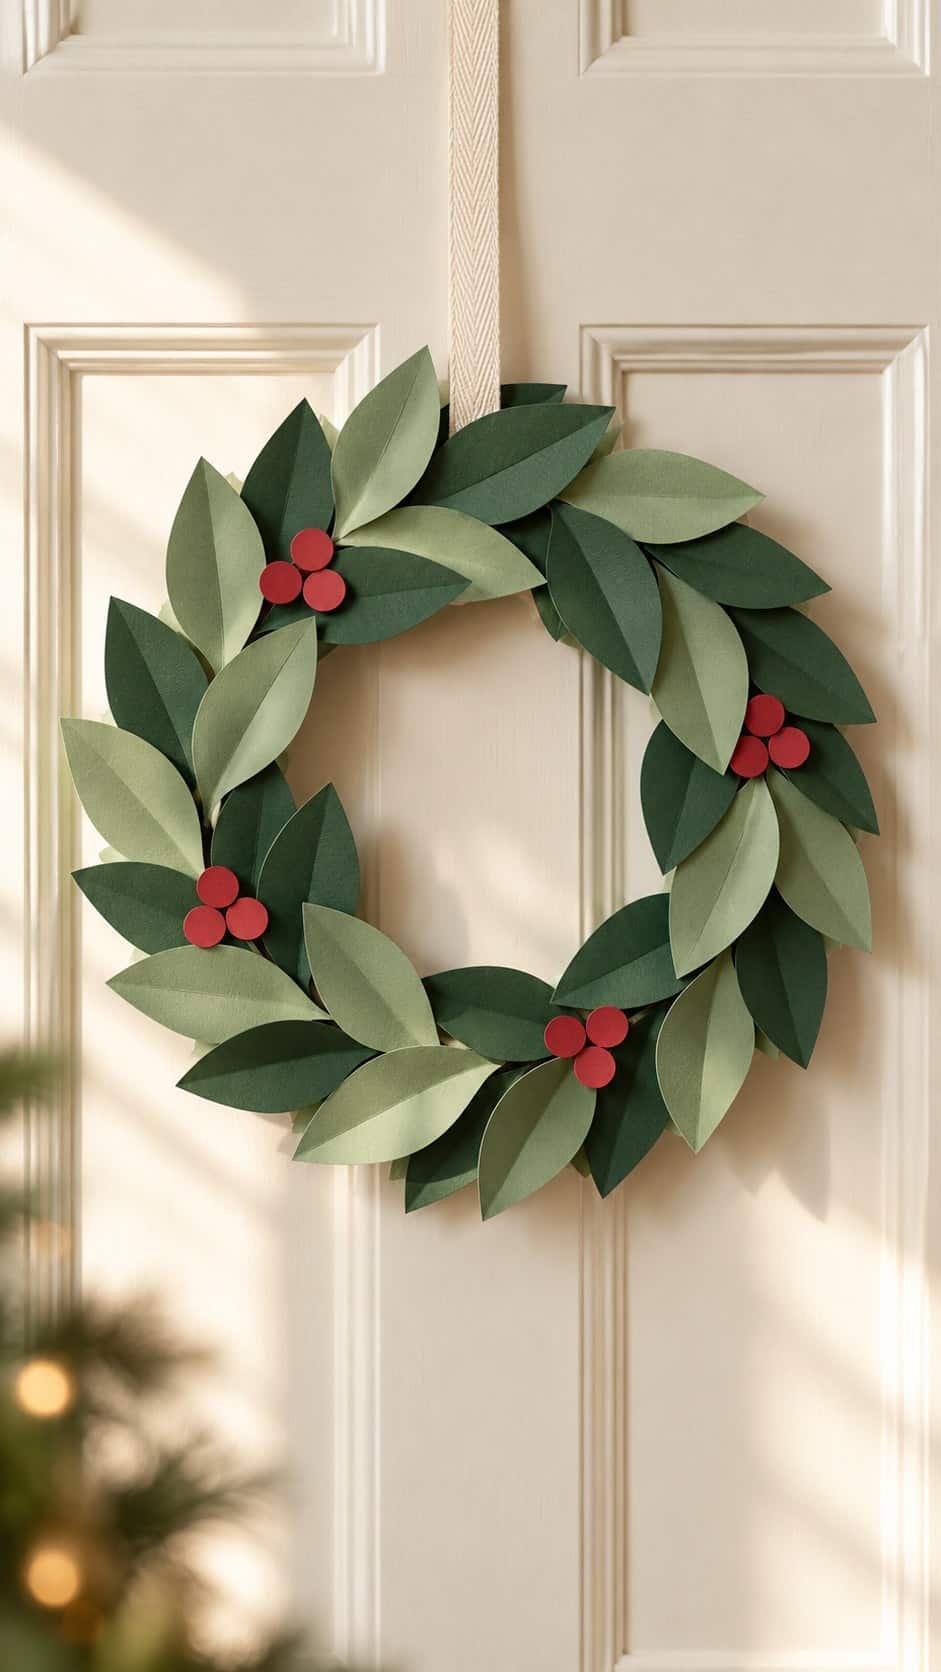
Use on an interior door or above a desk. Paper wreaths do not suit rain, steam, or outdoor damp.
Makes: 1 indoor wreath, roughly 9 inches across
Estimated time: 35-45 minutes, plus drying
What you need
- One clean thin cardboard sheet at least 7 x 7 inches
- Two sheets of green paper or light cardstock
- Ring and 2 1/2 inch leaf templates from this pack
- Tacky glue, scissors, pencil, 10 inches of ribbon
- Optional small red paper circles
Step-by-step instructions
- Trace the 7 inch outer circle and 3 1/2 inch inner circle onto thin cardboard. Cut out the ring. An adult can fold the center gently to start a scissor cut, then flatten it again.
- Trace and cut about 24-30 leaves, each 2 1/2 inches long. Gently crease each leaf lengthwise for dimension, then open it slightly.
- Tie the ribbon around the top of the bare ring to form a hanging loop. Position the knot at the back.
- Arrange the leaves around the ring before gluing. Point them in the same direction, alternating slightly inward and outward to cover the cardboard.
- Glue only the lower third of each leaf. Work around the ring, overlapping each base with the next leaf. Tuck the last few bases beneath the first leaves to hide the joins.
- Add clusters of red paper circles if desired. Dry flat, then hang indoors on a suitable hook.
Helpful tip: Save cereal-box cardboard for the base and use paper scraps for the leaves. A small color variation adds depth.
Troubleshooting: If cardboard shows through, add a leaf over that gap after the first layer dries. The exact leaf count depends on spacing.
MAKE A LITTLE HOLIDAY MAGIC
Shop the Supplies: Paper-Leaf Wreath
Choose green paper or light cardstock, plus a narrow ribbon. Reuse clean cereal-box cardboard for the ring and red paper scraps for optional berries; the templates are free above.
Browse supply options on Amazon. Check sizes, paper weights, and adhesive labels before choosing.
✦ ✦ ✦
9. Paper Gingerbread-House Garland
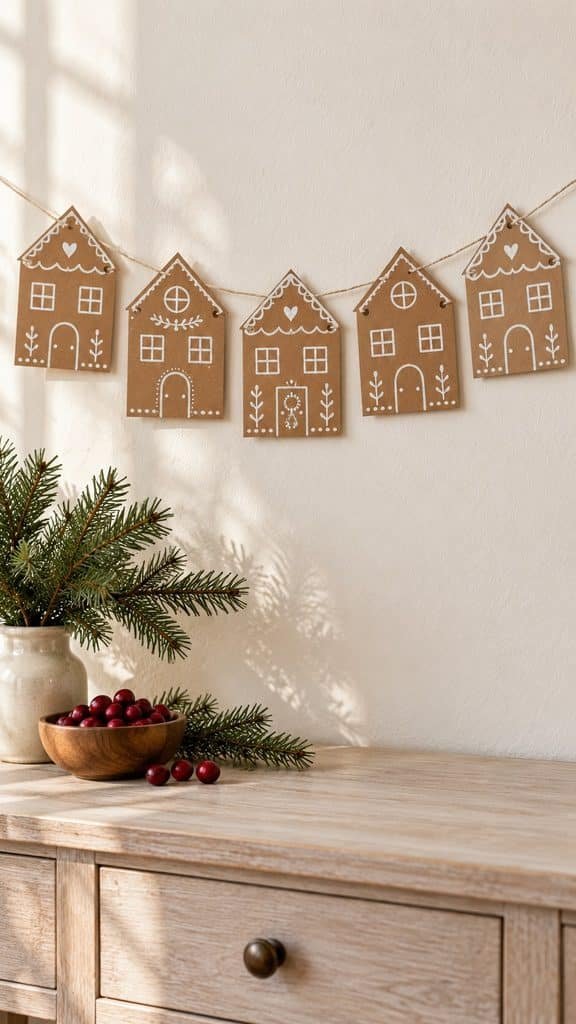
Let the houses sit at slightly different heights for a relaxed village effect on a shelf.
Makes: 5 houses on a 4 foot string
Estimated time: 30-40 minutes, plus ink drying
What you need
- Two Letter or A4 sheets of kraft cardstock
- House template from this pack
- White paint pen or white colored pencil
- Scissors, hole punch, ruler, 4 feet of cotton string
Step-by-step instructions
- Trace and cut five house silhouettes. Each has a 3 inch wide body, 2 1/2 inch tall walls, and a centered roof peak giving a total height of 4 inches.
- Draw a door and windows in pencil first. Leave at least 1/2 inch of clear space near the upper wall corners for the hanging holes.
- Trace your details with a white paint pen or colored pencil. Add simple roof dots or scallops, keeping the houses easy to read from a distance.
- Allow the ink to dry fully. Punch one hole near each upper wall corner, at least 1/4 inch in from the edge.
- Thread the string from front to back through one hole and back to front through the other, so the long span runs behind each house. Repeat for all five.
- Space the houses about 4 inches apart along the string. Add a small piece of tape behind each house if it slides. Hang the garland indoors with slack at both ends.
Helpful tip: Try the pen on a kraft scrap first. A white colored pencil is a low-mess alternative that needs no drying time.
Troubleshooting: If a hole tears, reinforce the back with clear tape and punch again slightly farther from the edge.
MAKE A LITTLE HOLIDAY MAGIC
Shop the Supplies: Gingerbread-House Garland
Choose kraft-brown cardstock and a fine white paint pen suitable for paper. A white colored pencil you already own also works. Use the free house template above.
Browse supply options on Amazon. Check sizes, paper weights, and adhesive labels before choosing.
✦ ✦ ✦
Make your decorations feel collected
Choose two main colors and one accent, then repeat them across the projects. Forest green, cream, and cranberry feel festive without making every piece identical. For a softer winter look, try white, kraft brown, and a little muted green.
Vary the scale: one large star, a few small baubles, and a cluster of standing trees often make a more inviting display than lots of equally sized pieces. Leave breathing room around each group.
Store completely dry decorations in a shallow box with tissue between layers. Unclip bag stars and fold them flat; nest cone trees only if their surfaces will not rub. Keep the box dry and avoid putting heavy decorations on top.
More technique help: paper-bag star folding and paper rosette construction. These traditional paper-craft methods can be adapted with your own colors and finishing touches.
✦ ✦ ✦
Easy Paper Christmas Decorations FAQs
What paper is best for paper Christmas decorations?
Use 80-120 gsm paper for accordion folds, rosettes, and chains. Medium-weight paper around 120-160 gsm works for circle baubles. Light cardstock around 160-180 gsm gives standing trees and house garlands more structure. Check each project list before cutting.
Can I make these crafts without a cutting machine?
Yes. These projects use scissors, a ruler, and basic paper-craft tools. The printable pack includes actual-size shapes for the trees, baubles, houses, wreath ring, leaves, and cone.
Why does my paper-bag star not open all the way?
Bag proportions affect how many bags you need. Start with seven and add matching bags until the ends meet comfortably. Glue should run along the closed bottom and vertical center, leaving side gussets free. Do not force the star open.
How do I print the templates at the correct size?
Choose the PDF matching your paper size and print at 100% or Actual Size. Turn off Fit or Shrink to Fit. Measure the test square: it should be exactly 1 inch, or 25.4 mm, on each side.
Can paper Christmas decorations be used outdoors?
These projects are intended for dry indoor spaces. Rain, condensation, and wind can damage the paper and weaken glued joints. Keep them away from candles, fireplaces, and heaters indoors too.
✦ ✦ ✦
A little paper, a little holiday magic
You do not need to finish all nine projects to make something lovely. Pick the one that fits your afternoon, put on a favorite playlist, and let the small handmade details bring a little personality to your home.
Save this guide for later, or choose one project to make with a friend. A paper chain today can become the start of a new holiday tradition.
If you’re making a paper garland, pair it with this dried orange garland with cinnamon and rosemary for a second handmade decoration.
Don’t forget to print your free craft cards so you can keep the supply lists and step-by-step instructions close while you create!
For another handmade texture, pair these projects with our snowy pinecone ornaments. You can also explore our simple mason jar crafts for more ideas to make throughout the year.