

A Christmas craft night is a lovely excuse to gather with friends, sip something warm, and make a few handmade keepsakes. These five easy projects include ornaments, winter decorations, and personal gifts.
Choose one main project and prepare the supplies ahead, leaving plenty of time to craft and catch up.
In This Guide
As an Amazon Associate, HypeVine earns from qualifying purchases at no extra cost to you. Thanks for your support!
A Simple Plan for Your Christmas Craft Night
For a first gathering, four to six guests is a manageable starting point. Ask everyone to choose a project before you shop, and tell them whether supplies are provided or whether they should bring anything, such as a printed photo.
- Pick the right project: Pre-cut felt ornaments are an easy, low-mess choice. Salt-dough painting suits guests who enjoy decorating. Photo wreaths offer more room for arranging and styling.
- Make one sample: Try your chosen materials before the party. This helps you check glue compatibility, paint coverage, and how long each step actually takes.
- Prepare a place for each guest: Cover the table, set out a tray or washable mat, and add brushes, a water cup clearly marked for paint, paper towels, and a name label.
- Share the extras: Put scissors, ribbon, paint, and glue within reach. Keep snacks and drinks on a separate surface.
- Plan for drying: Clear a shelf or side table and label each guest’s spot. Have shallow boxes or trays ready for projects that need to travel flat.
Host’s tip: A limited palette makes the table easier to use and the finished crafts feel coordinated. Try cream, forest green, and cranberry red, with a little gold. Offer two or three simple sample designs so nobody has to start from a blank page.
Timing note: The project times below are planning estimates for hands-on work with materials prepared in advance. Paint drying, glue curing, and salt-dough baking are additional. Follow the directions on the products you use.
1. Salt Dough Ornaments: Paint a Keepsake for the Tree
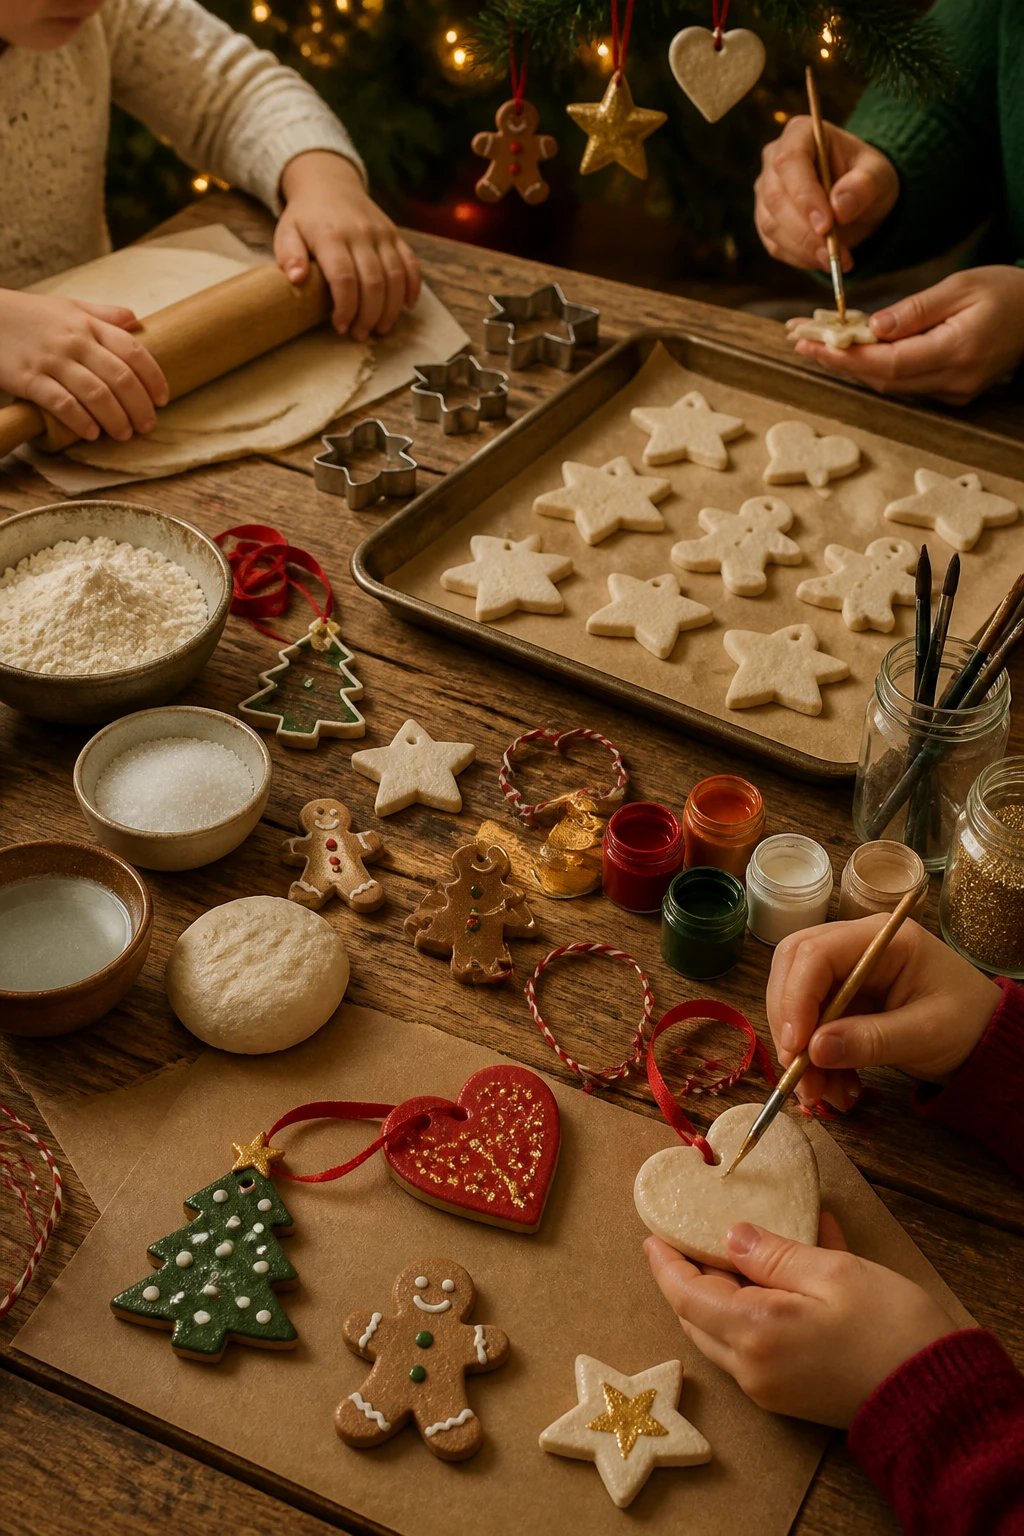
Stars, hearts, and little trees make lovely keepsakes, especially with a name and year on the back. For an evening party, make this a decorating station with fully baked, cooled blanks ready to paint.
Hands-on time: About 20–30 minutes to decorate a few small ornaments, plus paint drying. Plan per guest: Two or three blanks and ribbon for each.
You’ll need: Dry salt-dough blanks with hanging holes, acrylic craft paint, small brushes, paint palettes, ribbon or twine, and a marker for names.
Prepare ahead: To make the dough, mix 2 cups plain flour with 1 cup table salt, then gradually add up to 1 cup water until it forms a workable dough. Roll to about ⅕ inch (5 mm), cut shapes, and make a hanging hole before baking. Follow the Scouts’ salt-dough preparation and baking guide, allowing several hours for baking and full cooling. Finish this before your guests arrive.
- Choose a blank and paint a thin base coat, keeping the hanging hole open. Leave it flat to dry according to the paint instructions.
- Add simple dots, stripes, holly leaves, or initials. A brush handle makes an easy dotting tool.
- Once the painted surface is dry enough to handle, add the name and year on the back.
- Thread ribbon through the hole. If the paint is still tacky, send the ornament home flat and add the ribbon later.
Helpful finish: Avoid thick layers of paint, which take longer to dry. Store finished ornaments in a dry place. Salt dough is decorative, not edible, so keep the dough and ornaments away from pets and small children who may put them in their mouths.
Shop the Supplies
For painting and finishing your salt-dough keepsakes. Check your kitchen and craft drawer first.
2. Waterless Mason Jar Snow Globes: Mini Winter Scenes
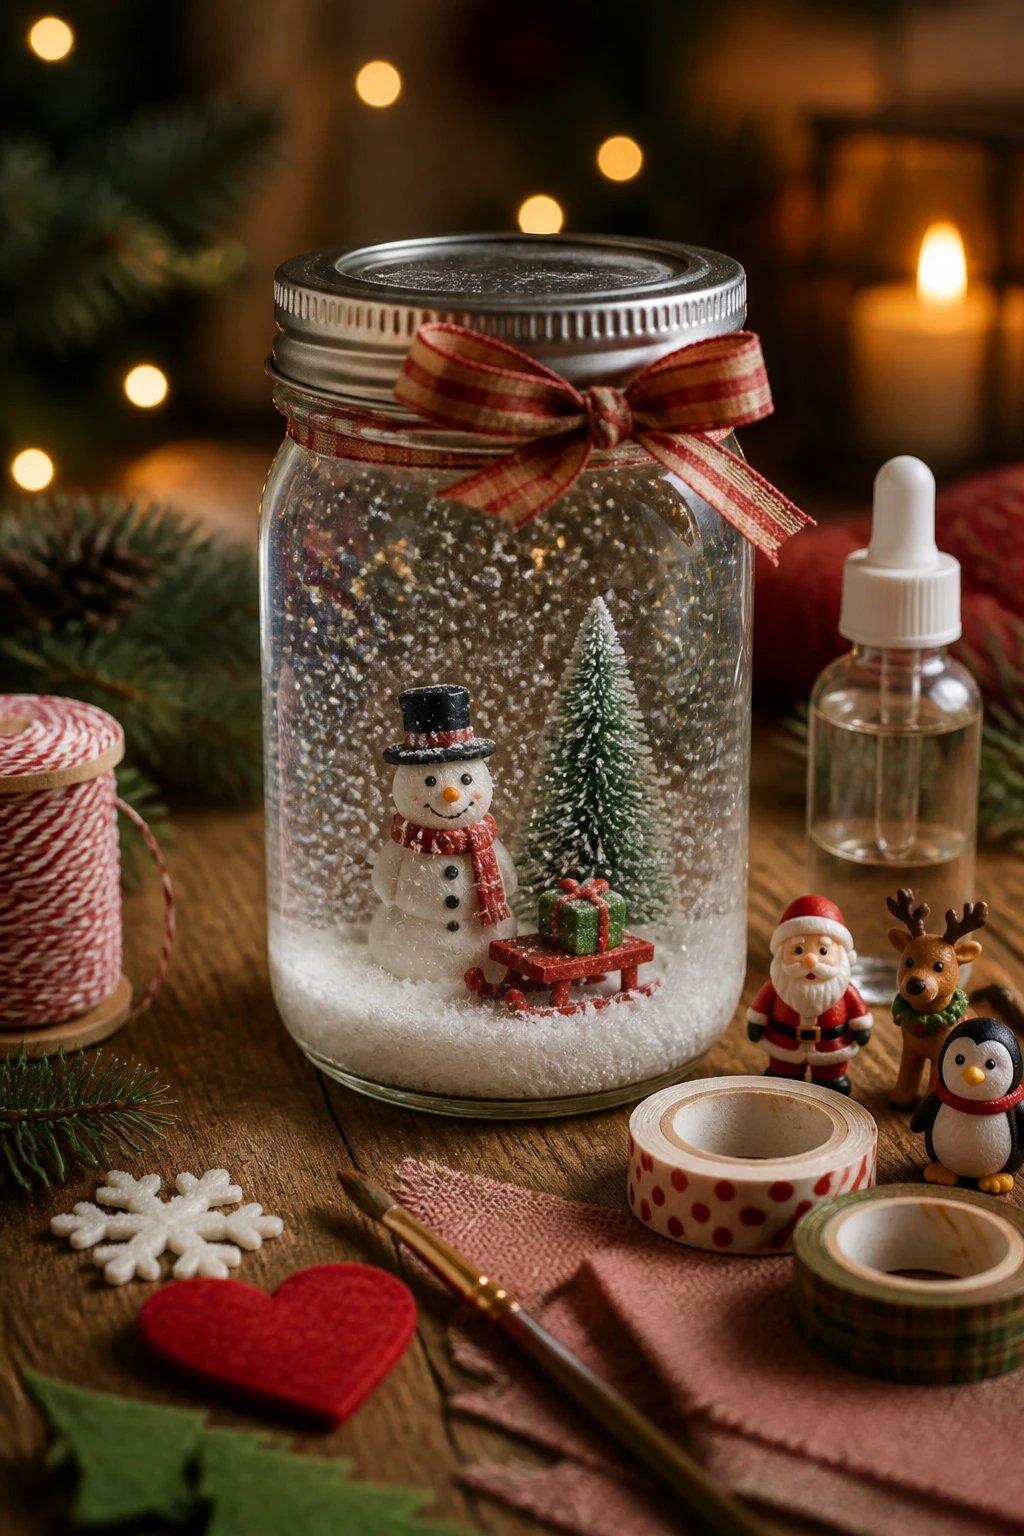
A tiny tree in a snowy jar feels magical on a shelf or mantel. A waterless version is particularly practical for a group: there’s no liquid to spill, no glycerin to measure, and no need to test whether decorations will bleed color in water.
Hands-on time: About 20–30 minutes, plus glue curing. Plan per guest: One clean, dry, wide-mouth jar with a secure lid, one small tree or figurine, and a small amount of faux snow.
You’ll need: Jars, miniature decorations that fit through the opening, faux snow, ribbon, and craft adhesive labeled for your lid and decoration materials. Choose an adhesive suitable for indoor craft use and follow its ventilation and curing directions.
- Stand the tree or figurine on the inside of the lid and lower the empty jar over it. Check the height and width before gluing.
- Attach the miniature to the inside of the lid. Keep glue away from the threads and allow the bond to cure for the full time on the label.
- Place a shallow layer of faux snow in the jar. Start with less than you think you need so it won’t bury the scene.
- Once the decoration is secure, screw the lid onto the upright jar, then turn the whole jar over so the lid becomes the base.
- Tie ribbon around the outside of the base and display the jar where it won’t be knocked over.
Make it party-friendly: If the glue needs overnight curing, attach the miniatures the day before and let guests add snow and ribbon during the party. If guests assemble their own scenes, send the jar and lid home separately until the glue has cured. Skip shaking these display jars.
Shop the Supplies
Choose miniatures that fit through your jar opening. Match the adhesive to your lid and decoration materials.
3. Hand-Painted Flameless Candles: A Personal Holiday Glow

Little holly leaves, scattered dots, and simple stars can turn a plain flameless candle into a thoughtful decoration. Use battery-operated candles with a paintable outer surface, and check the candle maker’s care instructions before decorating.
Hands-on time: About 20–30 minutes, plus paint drying. Plan per guest: One flameless pillar candle.
You’ll need: Battery-operated candles, paint suitable for their exterior material, fine brushes, paper for practicing patterns, and a soft cloth. Test the paint on one candle beforehand, since some wax-effect or plastic finishes won’t hold it well.
- Turn the candle off and gently wipe its exterior with a dry cloth. Keep the light, switches, sensors, and battery compartment clear.
- Practice a tiny design on paper. Dots, short leafy strokes, or a simple initial are easier than a detailed scene.
- Paint a small area of the candle’s outer side with thin coats, leaving drying time between layers.
- Let the paint dry fully before handling or turning the candle back on. Add a gift tag once the surface is dry.
Important: These instructions are for flameless candles only. Do not apply ordinary acrylic paint, craft glue, glitter, or sealant to candles intended to burn. Do not heat-set paint on a battery-operated candle.
Shop the Supplies
Use battery-operated candles only. Check the maker’s decorating guidance and choose paint compatible with the exterior.
4. Felt Cookie Ornaments: A Simple No-Sew Project

Soft felt shapes make sweet little ornaments without needing a sewing machine. Tan felt looks like gingerbread, while cream felt strips create an icing effect. Keep the pieces flat for a simple no-sew version.
Hands-on time: About 20–30 minutes for one or two ornaments, plus glue drying. Plan per guest: Two pre-cut shapes with matching backs, felt scraps, and two ribbon loops.
You’ll need: Felt, paper templates, fabric scissors, felt-compatible fabric glue, narrow ribbon, and small felt offcuts for decorations. Adults can add embroidery details if they enjoy stitching.
- Draw a simple tree, star, or gingerbread shape on paper. Cut it out and use it to cut two matching felt pieces.
- Decorate the front piece with thin cream felt strips and small colored felt shapes. Arrange everything before applying glue.
- Fold a short length of ribbon into a loop. Glue the two ends between the front and back felt pieces at the top.
- Glue the matching back in place with a thin layer of adhesive, gently press, and leave flat for the recommended drying time.
Easy variation: Pre-cut larger shapes for guests who find fiddly cutting difficult. Use felt dots instead of loose beads for a simpler setup, and supervise children with scissors and small craft pieces.
5. Photo Wreath Frames: A Little Circle of Memories

A small hoop wreath becomes personal with a favorite snapshot, a few sprigs of faux greenery, and a soft ribbon bow. Ask guests to bring copies of photos rather than irreplaceable originals.
Hands-on time: About 30–45 minutes. Plan per guest: One 6–8-inch wooden hoop, two or three small greenery sprigs, one lightweight photo frame or cardstock photo mount, ribbon, and a hanging loop.
You’ll need: Hoops, lightweight frames or cardstock, printed photos sized for the frames, faux greenery, floral wire or twine, mini clips, ribbon, scissors, and wire cutters if using wire.
- Place the hoop flat and arrange greenery along the lower third. Keep the upper area open so the photo remains the focus.
- Tie the sprigs securely to the hoop with twine or floral wire. Tuck any cut wire ends inward so they cannot scratch.
- Fit the photo into a lightweight frame or cardstock mount. Tie or clip it securely inside the hoop using its hanging loop or mounting points.
- Add a ribbon bow over the tied greenery and a hanging loop at the top.
- Lift the wreath gently to check its balance. Adjust the frame and greenery until it hangs straight.
Helpful shortcut: Cardstock photo mounts are lighter and easier to attach than heavy frames with glass. Have blank cards available for a handwritten holiday message if someone forgets a photo.
Shop the Supplies
Choose a 6–8-inch hoop and lightweight photo mount. Cardstock mounts are an easy alternative to glass frames.
An Easy Two-Hour Craft Night Timeline
This sample schedule works best with one main project and all baking, pre-cutting, and lengthy glue curing completed beforehand.
- First 15 minutes: Welcome everyone, offer drinks, and show the finished sample.
- Next 10 minutes: Demonstrate the trickiest step and point out the shared supplies and drying area.
- Next 45 minutes: Make the main project. Keep spare blanks or felt shapes nearby for anyone who wants to try again.
- Next 20 minutes: Take a snack break while paint or glue dries. Guests can write gift tags if they wish.
- Final 30 minutes: Add finishing touches where dry, take a group photo, and pack projects for the trip home.
Send it home successfully: Write each guest’s name on a shallow tray or box before crafting starts. Keep wet painted pieces uncovered and separate. Include a quick note if something still needs curing, ribbon, or final assembly at home.
Christmas Craft Night FAQs
What is the easiest Christmas craft for beginners?
Pre-cut felt ornaments are a good place to start because guests can arrange and glue the decorations without learning a new technique. Painting ready-made salt-dough blanks is another easy option.
How many crafts should you plan for one evening?
Choose one main project for a two-hour gathering. Add a quick optional extra only if guests have time. Offering all five projects at once means more supplies, more setup, and less time to help each person.
Can salt-dough ornaments be made and painted on the same night?
Not reliably during a short craft night. Baking and cooling take extra time. Prepare fully dried blanks in advance, or make shaping the dough a separate session and decorate it later.
How can you keep a Christmas craft night affordable?
Ask guests to choose their project before buying materials. Share paints and tools, reuse clean jars, use felt offcuts, and choose cardstock photo mounts instead of new frames. Buy enough bases for each person plus a small number of spares.
What should guests bring?
Tell guests what you will provide. For photo wreaths, ask for a printed photo that fits the chosen mount. An apron or old shirt is useful for painting, and a shallow box helps carry finished pieces home.
Make Room for a Little Handmade Christmas
A lovely Christmas craft night doesn’t need a full workshop or perfectly matching results. A little preparation, one approachable project, and a comfortable place to gather are enough to get started. Choose the idea that suits your group, leave room for conversation, and enjoy the small details that make each creation personal. For another creative afternoon, explore these easy paper Christmas decorations, try more simple mason jar crafts, or make a keepsake from these nostalgic DIY Christmas ornaments. Save this guide for your next festive get-together.

Save this pin for your next Christmas craft night.